How to replace a broken side marker light
Motorhome advice: How to replace a broken side marker light
MMM’s project Auto-Trail Tracker has had an interesting time since it’s been with us and has ‘enjoyed’ having its innards dissected during various invasive upgrades. It would be fair to say it’s not had the most relaxing retirement. But now we’re readying it for sale and, as such, it needs all those small jobs doing. One of which was replacing a side marker light that had been accidently knocked off.
Fortunately, the Hella side marker lights fitted to this Auto-Trail are still available and cheap. We paid £5.99 for a complete lens, base and lamp delivered to MMM Towers from eBay supplier called Boltonbits, although of course other suppliers are available.
Fitting it proved satisfyingly simple and took about an hour to do, taking my time. Apart from the usual screwdrivers and a sealant gun, the only other specialist tools needed were some wire strippers and crimpers. Now our Auto-Trail is ready for its MoT and, after a good clean and a couple of other small jobs, it will be ready for sale.
To replace a broken side marker light, you will need:
- Crosshead screwdriver
- Crimp-on spade terminals
- Side marker light (Hella, £5.99 from boltonbits on eBay)
- Panel wipe (or white spirits or meths)
- Rag
- Wire stripper
- Wire crimper
- Sealant gun and silicone sealant (optional).
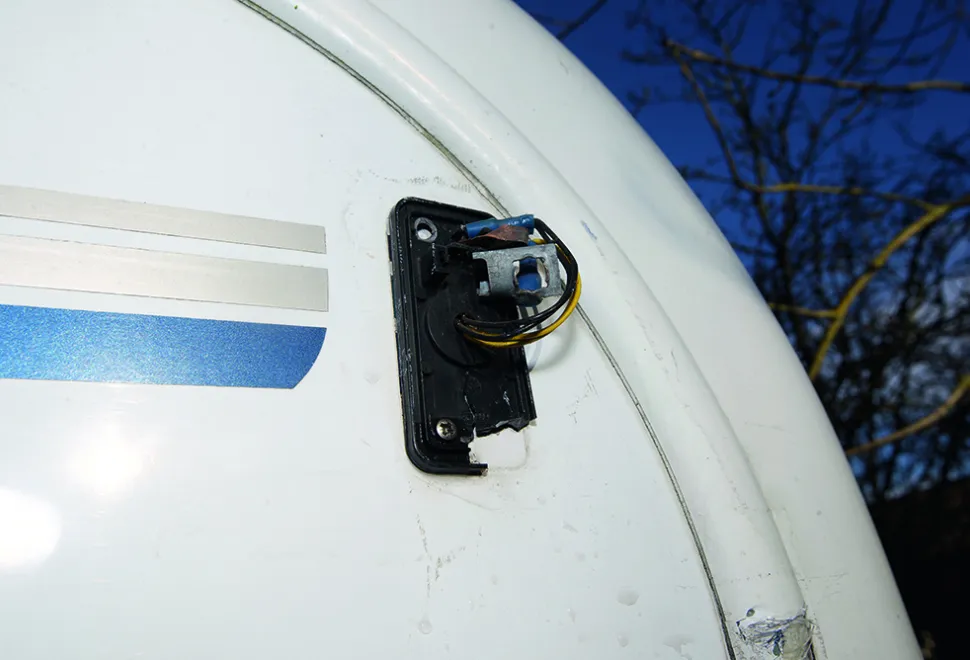
1
This is the broken side marker light. It was covered with water-tight tape prior to replacement.
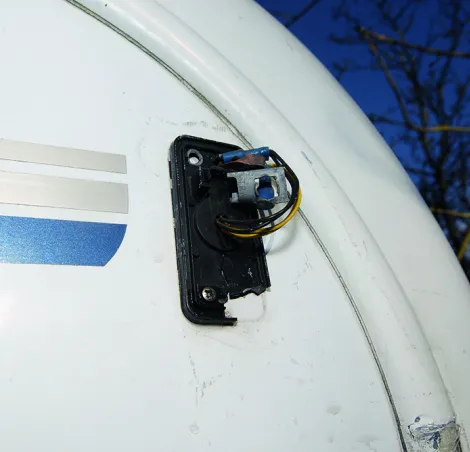
2
Remove the spade terminals from the lamp holder and discard any broken bits.
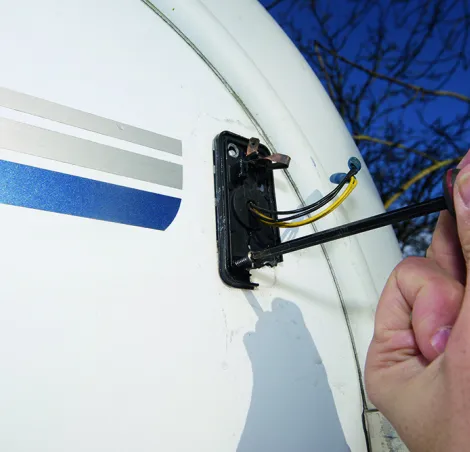
3
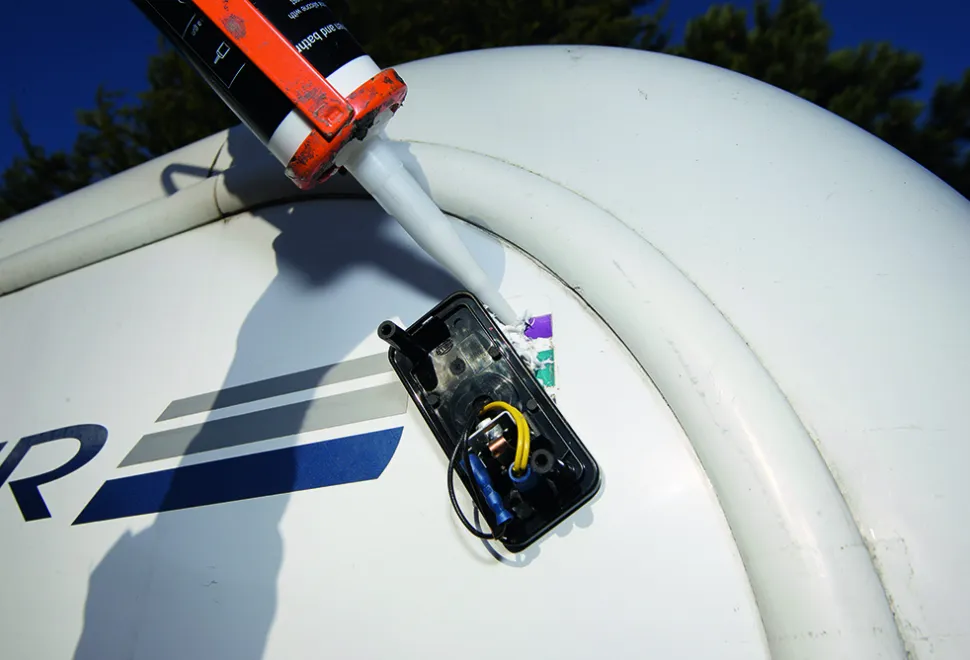
Unscrew the two screws securing the plastic part of the lamp holder base to the bodywork.
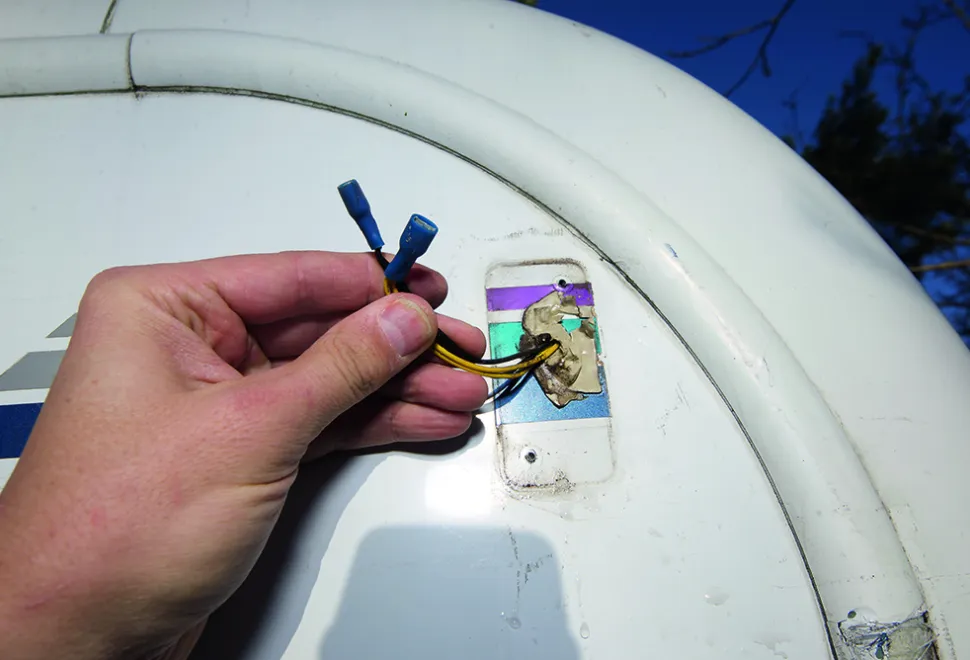
4
Pull the wires through the hole in the old base and remove it. We found different coloured stripes under ours – go figure!
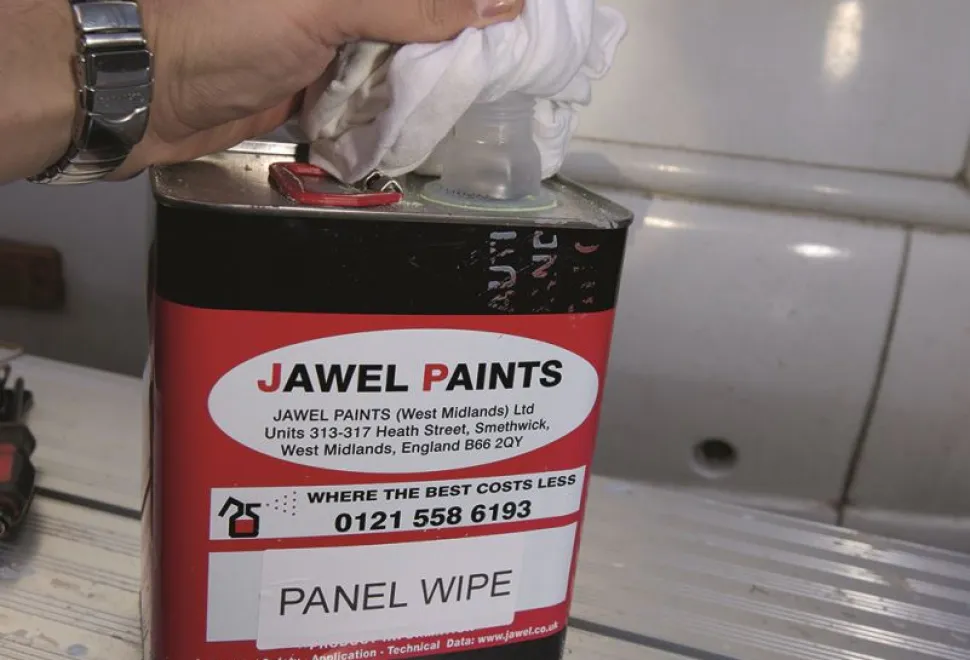
5
Using a rag soaked in panel wipe (or another solvent such as white spirit or meths)...

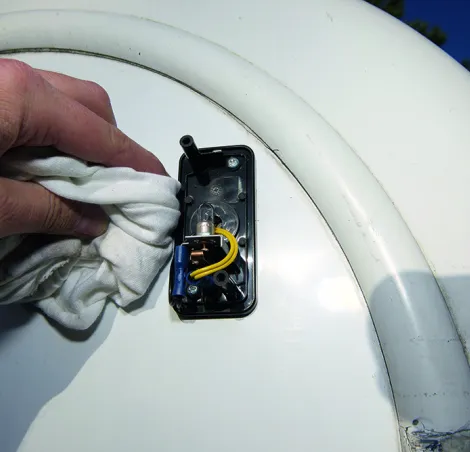
6
...clean off the residue of old sealant and any dirt around the edges of the old lamp holder base.
7
The old terminals won’t fit through the hole in the new side marker lamp base (and they looked a bit green anyway) so were cut off.
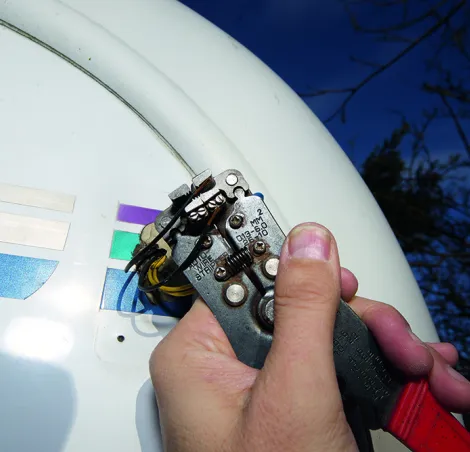
8
Automatic wire strippers (which are highly recommended) were used to strip the ends of the wires.
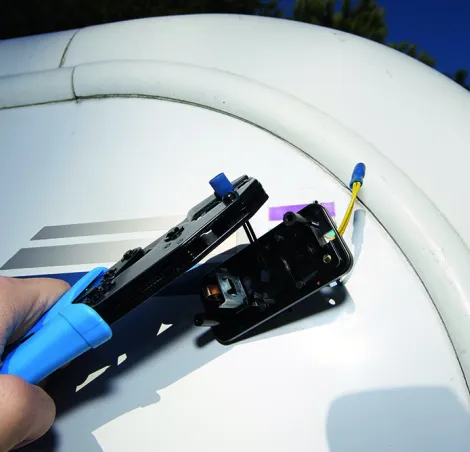
9
The wires were fed through the new lamp base and a new insulated terminal crimped onto the base.
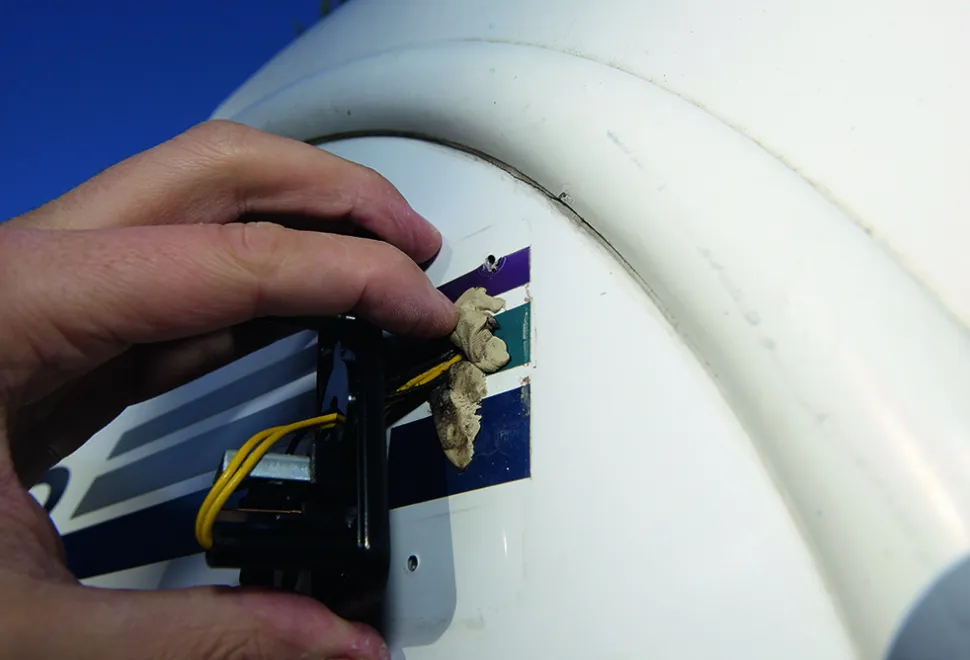
10
The non-setting putty to the rear of the lamp holder was reshaped to seal the hole.
11
Just to make sure no water got into the bodywork the top edge and side were sealed with sealant (don’t seal the bottom edge as you’ll trap water in).
12
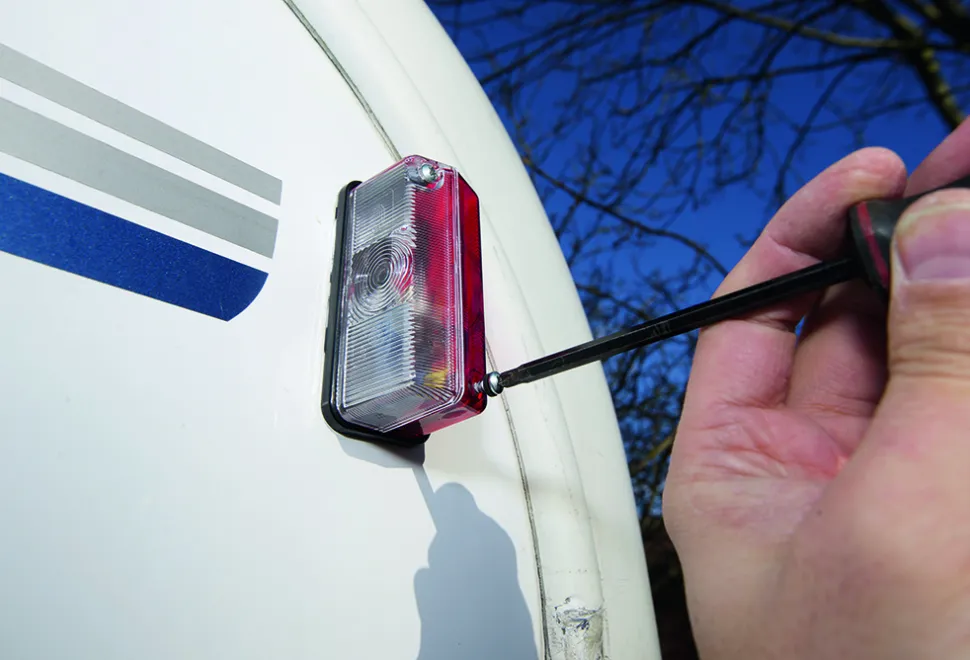
The lamp holder was then screwed back in place and any sealant residue wiped away. Check no wires are trapped at the edge of the holder.
13
Tuck the wiring away from the lamp itself, then screw the new lens in place using the supplied rubber washers under the screwheads.
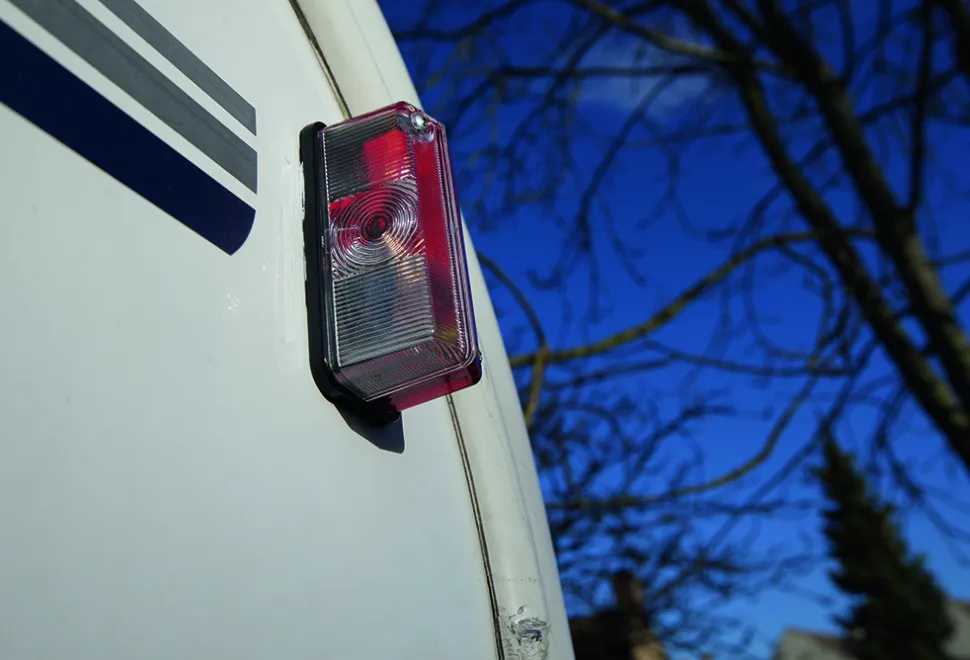
14
Switch the engine on, turn on the lights and check the side marker light works. If it doesn’t and any other lights are out, check the fuse. Done!