
How to make a spare wheel carrier for a motorhome
Technical advice
How to make a spare wheel carrier for a motorhome
One of the concerns for many owners is that most motorhomes do not come with a spare wheel. Some owners just shrug it off on the basis they won’t attempt a wheel change themselves anyway. Others put reliance on the puncture seal kits provided with the vehicle.
Finding the space and allowing for the increased weight is not an easy decision to make if you want to add a spare wheel. Some motorhomes are better suited to carrying a spare wheel than others.
The type of journey, distance from assistance and the ability to communicate with help (phone signal strength) need to be considered. I decided that, in my situation, a spare wheel was worth it.
Where should you fix your spare wheel?
Motorhome spares are significantly heavier than those on cars as they are bigger and are built to carry heavier loads.
A 16-inch Fiat Ducato spare with a 225mm wide tyre weighs 29kg. The weight penalty for fitting a spare wheel is about 30kg, as the weight of the frame is partially offset by the removal of the air pump and sealant kit supplied with the vehicle.
Many motorhomes are built in such a way that there is precious little space for a spare wheel.
There are typically three places available:
1. Under the rear of the vehicle behind the rear wheels. This is very inaccessible. It is possible to use a special mounting kit to remove the spare and replace the punctured wheel, but handling such a heavy wheel in this area can be a struggle even for the fittest of us. This location can also limit ground clearance.
2. Inside a garage. The wheel is well protected and reasonably accessible, but it does reduce the usable space.
3. On the outside of the rear wall (this may not be practical on smaller motorhomes, or if you use a bike rack). This has good accessibility and can be protected from the weather and theft with a lockable cover.
I went for option three. Motorhome rear walls are usually fairly strong, but the weight of a spare wheel means that it is sensible to reinforce the back wall and provide a frame that transfers the weight of the spare wheel to the floor. That way the wall needs only to resist directional, pitching and acceleration/braking loads.
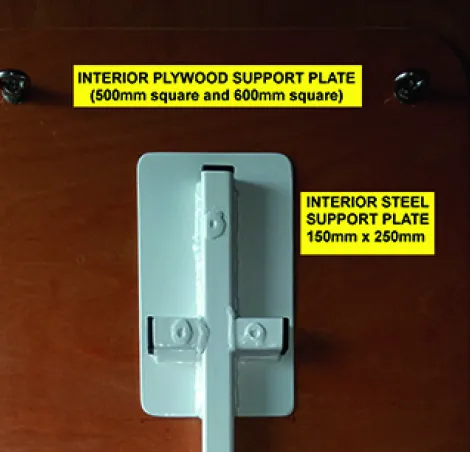
To reinforce the rear wall on the outside, I used a 5mm plate of aluminium. On the inside I used a double layer of 9mm plywood.
A cross-shaped box section was then welded together and equipped with studs to bolt through the bodywork and accept the externally mounted spare wheel.
Note that the bolt spacing (pitch circle diameter or PCD) of a Ducato varies – the PCD will either be 5 x 118mm or on a Maxi chassis, 5 x 130mm. The bolt sizes also vary from 14mm diameter to 16mm diameter.
If you don’t have access to welding kit this is a simple job for a local fabricator and you can either paint the assembly or get it powder-coated.
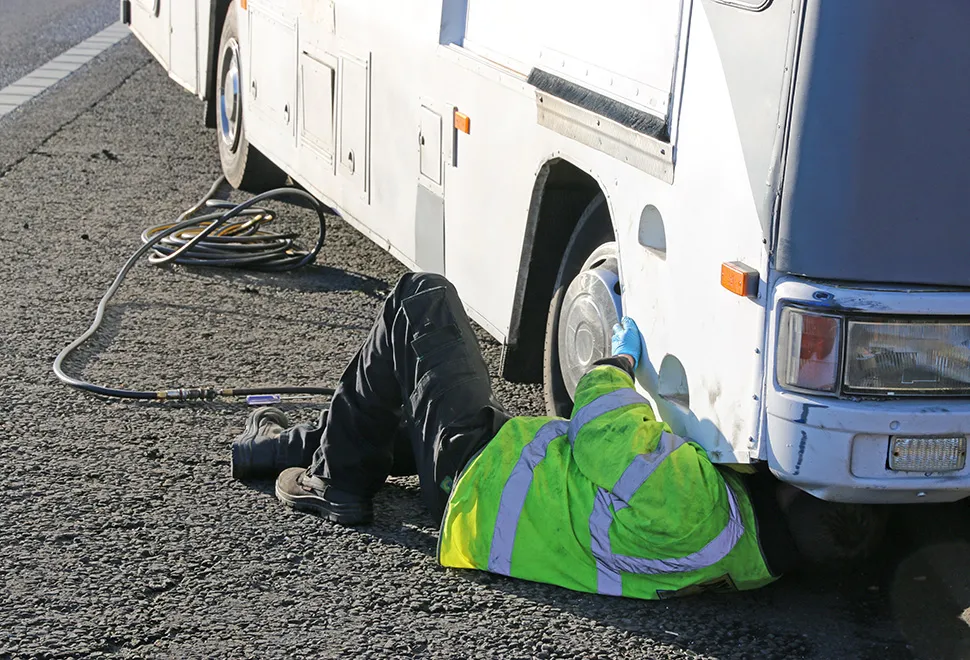
If you decide to carry a spare make sure that the jack provided is adequate, or buy a suitable additional jack (remembering to subtract it from your payload). The standard Fiat jack has a good foot size for good stability. Motorhomes with air suspension can minimise the lifting distance required.
An extending arm wheel brace will help to remove even the tightest wheel nuts and ease the effort required to raise the vehicle on the jack. A short socket extension will ease access to the spare wheel mounting nuts.
What tools do you need?
- Aluminium plate 5mm
- Plywood 9mm thick (single sheet 1,220mm x 610mm)
- Steel plate 3mm (used for upper plate and foot)
- 1m length of 30mm square steel tube with 3mm wall thickness (exact length depends on height necessary to clear bumper)
- 0.5m length of threaded rod – 14mm or 16mm (this is usually sufficient for three studs)
- M8 stainless-steel countersunk allen head set screws, washers and nyloc nuts for plate (4)
- M8 eyelets
- Nyloc nuts and washers
- 14mm/16mm fine thread (3)
- Tapered wheel nuts 14mm/16mm (4)
- Tapered wheel bolts 14mm/16mm (2)
- Spare wheel cover and graphics (optional)
- Silicone sealant
- Drill and selection of metal and wood bits
- MIG welder (find a local fabricator if you don’t have one)
- Hacksaw with metal cutting blade
- Jigsaw
- Selection of sockets and spanners
- Selection of metal
Step-by-step guide to building a spare wheel carrier
1. Create the outer support plate
Buy an outer support plate, made from 5mm sheet and cut to 400mm x 400m, precut online or at a local metal shop. The ends were radiused with a file and 8mm holes drilled and countersunk at the edges. 16mm holes were drilled in the centre. It was then power-coated.
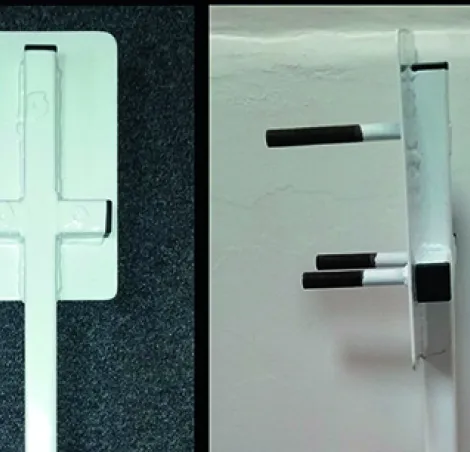
2. Build the frame
A cross-shaped frame was made from 30mm steel box section and studs welded in place. A 3mm steel plate measuring 250mm x 150mm was then welded to the cross, while a 30mm long section was bolted to the foot so that it can sit in the lashing rail. Powdercoating and square plastic end caps finish it off.
3. Create a new plywood plate
Create a plywood (9mm, cut to 600mm x 600mm and 500mm x 500mm with radiused edges) plate to help distribute weight more evenly. Drill holes through the plywood plates for the corner fixings, allowing the wheel studs to be bolted through.
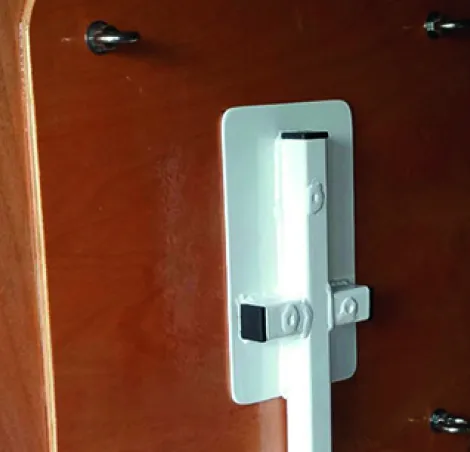
4. Affix the mounting plate
Once the position had been carefully measured outside, the external mounting plate was drilled through the bodywork and bolted to the inner steel frame. M8 eyelets were used in the corners and screwed onto the end of the set screws.
5. Adapt garage floor rail
The support foot has an 8mm tapped hole at its centre and rests on the garage floor rail. The bottom of the post finishes slightly above the bottom of the foot, so it doesn’t apply pressure to the floor. The rail needed a notch at its centre to allow the foot to be bolted to the frame.

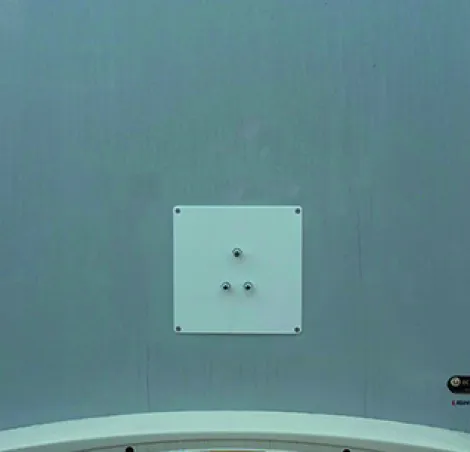
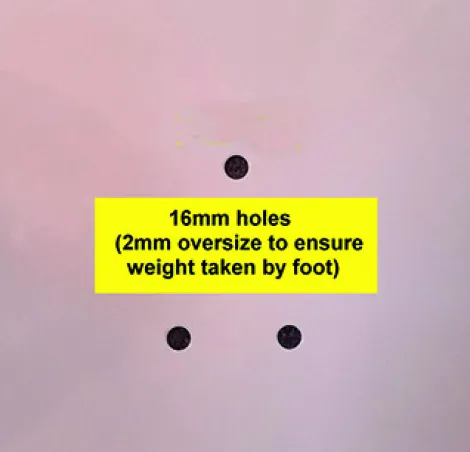
6. Affix the exterior plate
This is the exterior plate without the spare wheel in place. Make sure you carefully measure it several times before you reach for a drill (stud holes were all drilled 2mm oversize to avoid sidewall loading). All holes in the wall and aluminium plate were sealed with silicone.
7. Add the threaded rods
Each threaded rod was fed through the plate and bolted in place with washers and nylocs. A tapered wheel nut was screwed onto each thread to support the spare with the tapered end facing outwards. This provides a snug fit for the spare wheel.
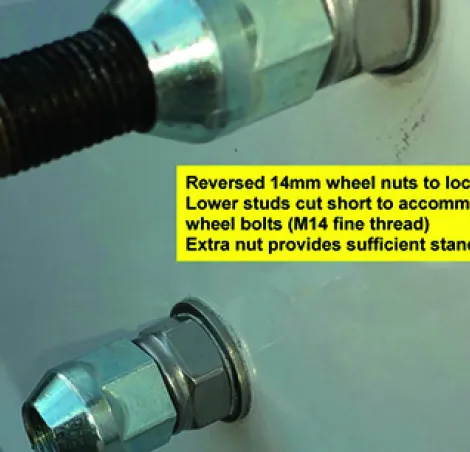
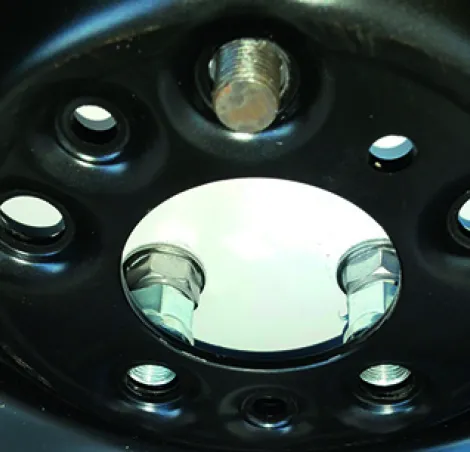
8. Place the wheel on the studs
The top stud is longer than the lower two to make fitting easier. Use a wheel nut to hold the wheel on the upper stud. The lower studs allow the standard wheel bolts to be screwed in place to hold the lower edge of the wheel. Actual stud lengths depend on rear wall thickness and wheel inner rim offset.
9. Add a spare wheel cover
To prevent UV and road debris effects, I added a spare wheel cover. These are widely available online in a variety of sizes and materials depending on your preference and can be used with a padlock for security. A local signwriting firm made up the Carthago vinyl logo.

Discover more practical advice
If you found these practical tips useful, you should check out our forum - it's packed full of hard-earned wisdom from motorhomers and campervanners across the country!
Latest motorhome articles

Explore our magazines
Enjoy expert tech help, travel and campsite inspiration, buying advice, reviews, and more with our best-selling magazines and guides.

Buying Your Perfect Motorhome
Buying Your Perfect Motorhome is the ultimate guide to turn your motorhome adventure into reality. From models starting at £20k to luxury options, layouts, finance, insurance, and a dealer directory, it has everything you need to find your dream motorhome.

MMM magazine
MMM is the UK’s best-selling motorhome magazine and your key to unforgettable trips, both in the UK and overseas. Packed with expert reviews, advice and maintenance tips to help you make the best choices and keep your motorhome roadworthy.


