How to make an extendable tabletop
Motorhome advice: how to make an extendable tabletop
The standard table on our motorhome is super; it can be rotated, slid in all directions and is very light and sturdy. But, sometimes it’s too big and at other times not big enough.
This project was inspired by panel vans we saw at Düsseldorf in 2017. One such example had a narrow table with two half-width panels that folded on top, or hinged out when required. The plan was to replicate something similar.
In our case, the smallest size was limited by the supporting metalwork beneath – just over 500mm by 500mm. The two fold-over flaps were 1mm narrower when side-by-side than the base to ensure they closed when folded over. Weight and strength are important and the existing table is some 30mm thick. So we opted for a melamine-faced plywood; this gives more strength and tolerance to vibration than chipboard or MDF.
I emailed 10 potential suppliers. I wanted my parts cut to size professionally on a machine, not using a jigsaw! Most firms responded, some sooner than others; most offered only chipboard or MDF. One small company on a farm in Oxford was first; it would be expensive as it had no offcuts, so it would mean using a new 8ft x 4ft sheet. We opted for 16mm thick ply, which was close to the thickness of the original table.
Then hinges were needed; Google and Amazon came into play again. I needed two stainless steel piano hinges 500mm long. The better-quality product from Germany was a 1,200mm length of 32mm wide material, with stainless steel screws for £20, including delivery.

To make an extendable tabletop for your motorhome, you will need:
- 8ft x 4ft sheet of double-sided melamine-faced birch ply with parts cut to size (£168.59, delivered from cutlist.co.uk)
- Hinges with screws (Amazon £13.18, plus £7.50 delivery)
- Orbital sander
- Sharp knife
- Varnish
- Paintbrush
- Hacksaw
- Electric screwdriver with selection of bits
- File
- Torx screwdriver bits
- 12mm diameter aluminium rod (steel tube or wooden poles could be used)
- 6mm polycarbonate offcuts (other materials could be used – I had this in stock)
- Drill and selection of bits
- Selection of self-tapping screws.
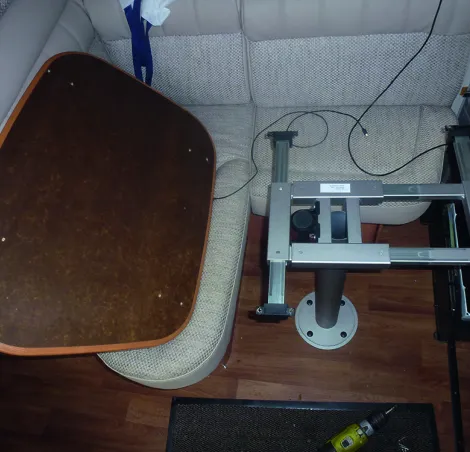
1
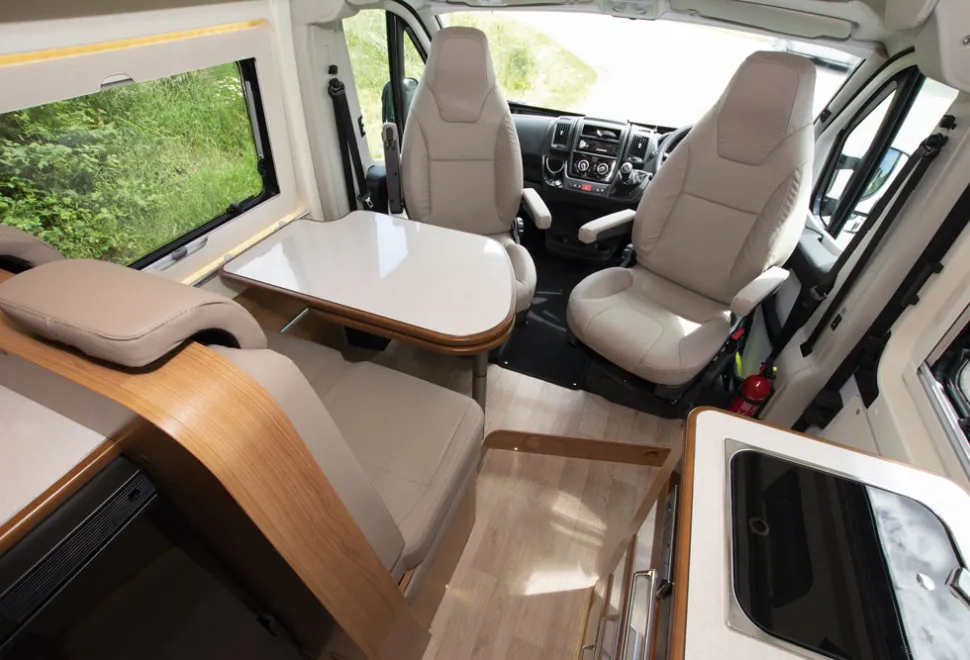
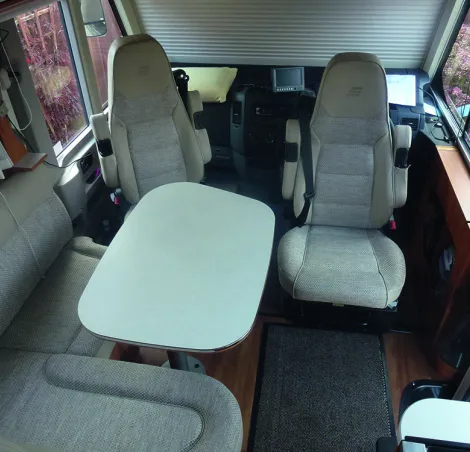
This was the stock table fitted to our motorhome.
There’s nothing wrong with it but it’s not very adaptable.
2
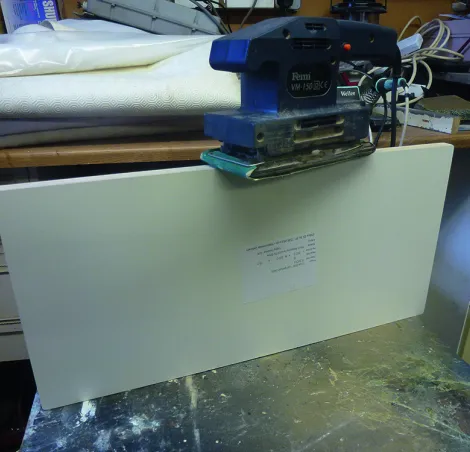
The parts arrived, complete with this handy section of spare melamine-faced ply. We could have had other parts cut at no extra cost if we wanted.
3
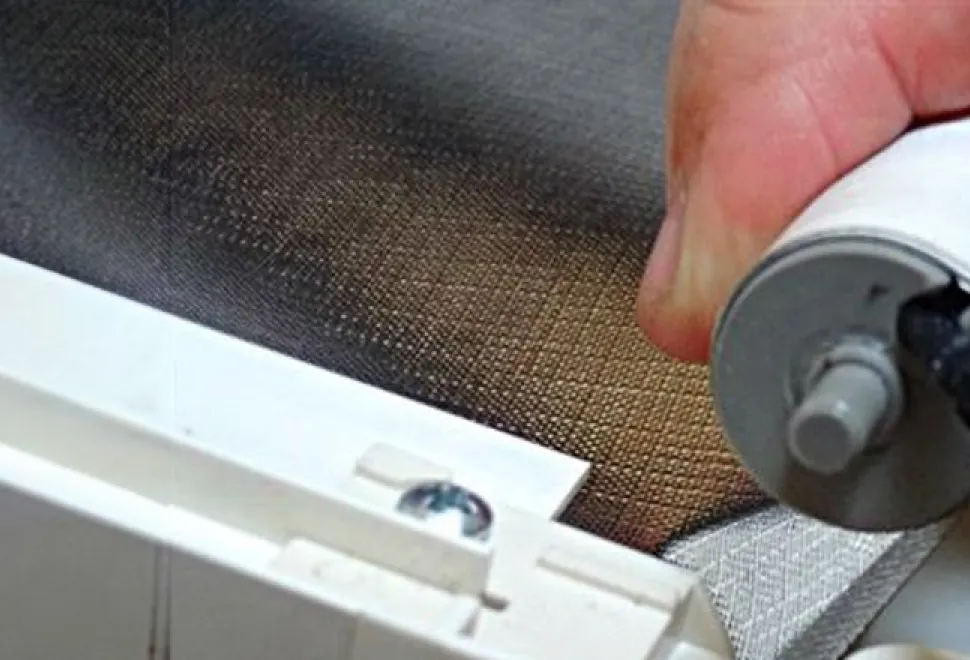
First, use the orbital sander on all the sides and run a blade carefully along the edges of the melamine to remove the sharp corners.
Varnish all the edges.
Accuracy is not necessary as it’s easy to wipe off any varnish that gets onto the melamine.
4
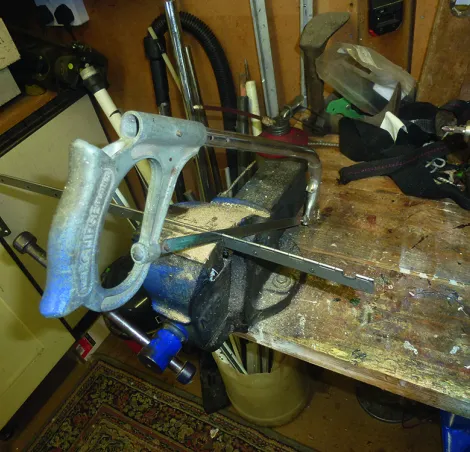
The hinges were cut to length using a hacksaw.
The edges were radiused with a file and any rough edges sanded smooth.
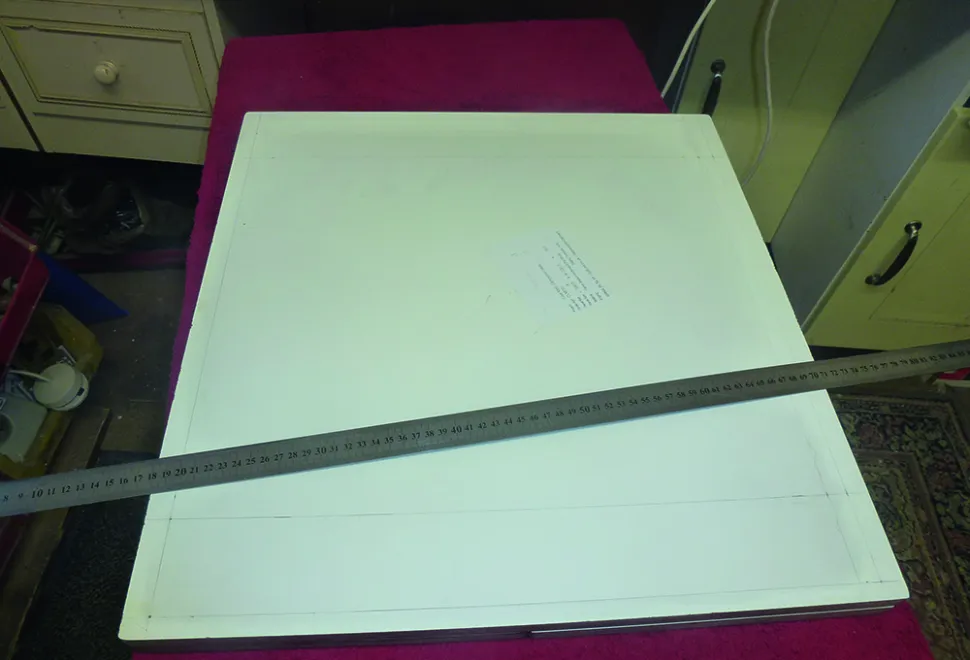
5
Remove the original table and, using a long straight edge, accurately record the dimensions of all the fixing holes.
The Torx screws took some spotting!
6
Align the two sections of table and screw the hinges in place.
I started with the four corner screws then added the rest.
Careful use of an electric screwdriver saves the wrist.
The hinges were attached with great care to ensure that they were central.
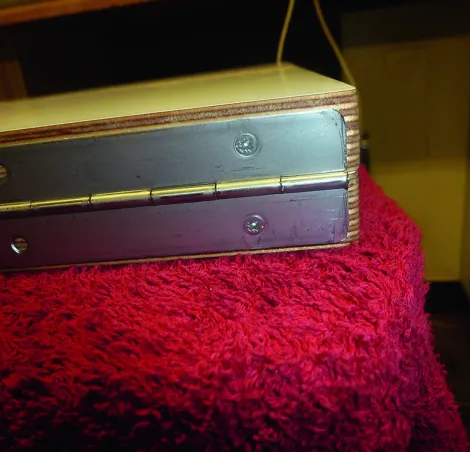
7
This is what you’re aiming the fitted hinges to look like.
8
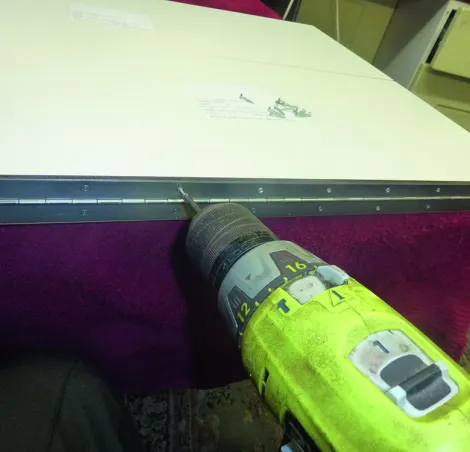
Using the dimensions gleaned from the removed tabletop, mark out the base of the new top, keeping everything equidistant from all sides.
Then drill small pilot holes for all the screws to aid accurate reassembly.
9
It soon became apparent that the opening table extensions would not be robust enough hanging just on the hinges alone, so some extra supports were necessary.
Fortunately, the two existing rectangular table slides were hollow and I was able to make four pull-out table supports that slid inside these.
To install these, I removed the original plastic end caps and drilled a 12mm hole in it.
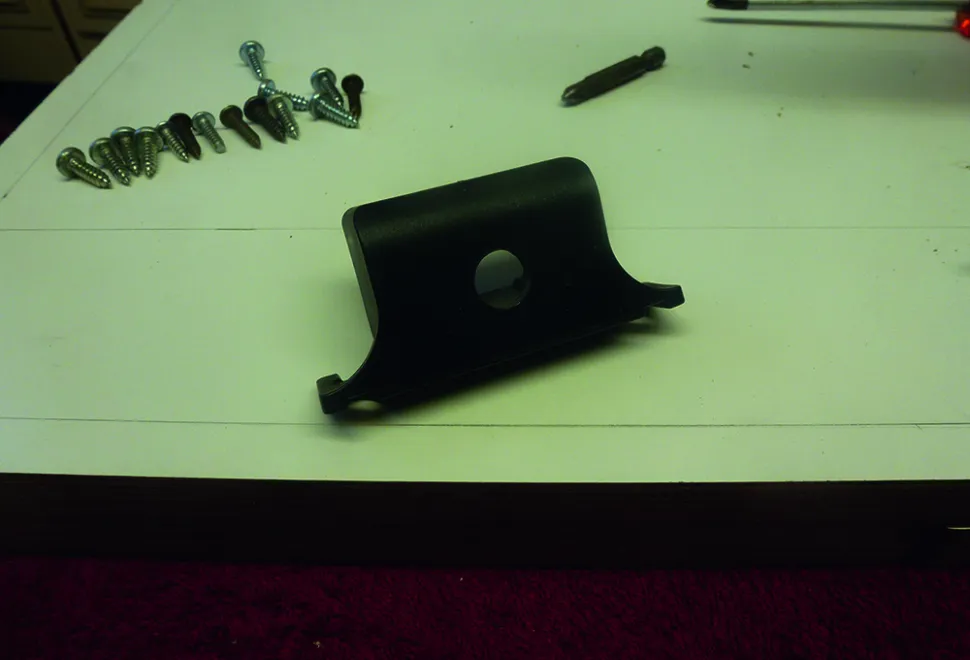
10
The end supports were then made, one for each corner. I made my tube guides and front handles from 6mm thick polycarbonate sheet (because I had some) drilled and screwed to a tube.
Hardwood timber or ply would work just as well.
The 12mm diameter rods could be steel, but I used aluminium, again because I had some.
Wickes (and most DIY stores such as B&Q or builders’ merchants) stock a range of metals if you don’t have a junk pile like me.
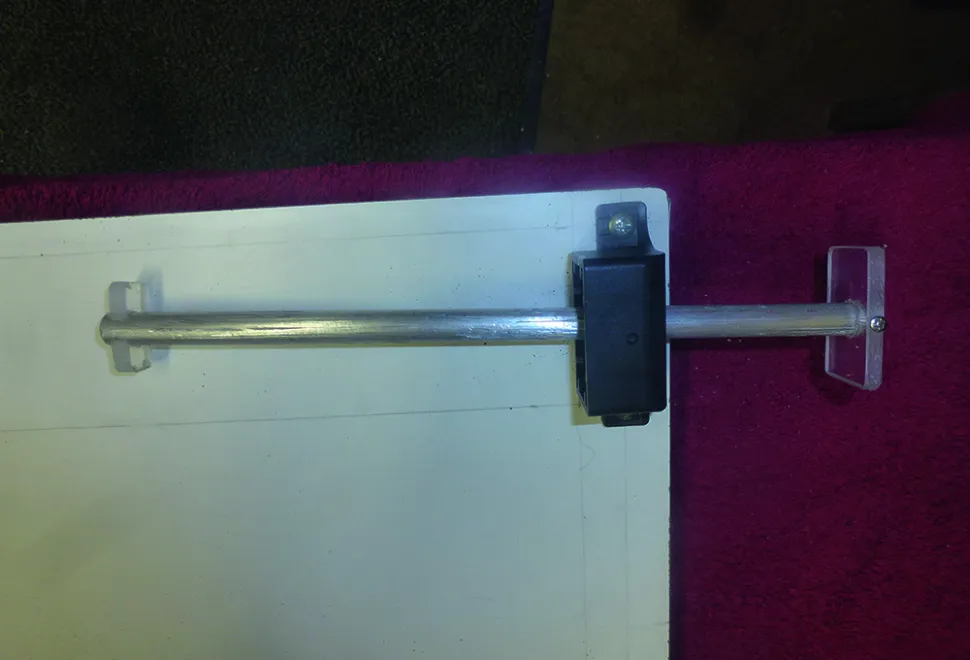
11
After a successful trial assembly of one corner, support legs were made for each corner.
The rectangular box tube is part of the original table support and was removed to the workshop to make sure everything fitted correctly before it was fitted to the motorhome.
12
It was now time to install it into the motorhome.
The rectangular box tube was first put back and two of the plastic retaining end caps fitted to the table underside.
The table was then slid over the far ends of the two box section tubes, leaving only the front end caps to fit (lying upside down on the floor).
The pilot holes proved to be very useful.
The original screws were substituted with new 16mm long versions to account for the thinner new table.
13
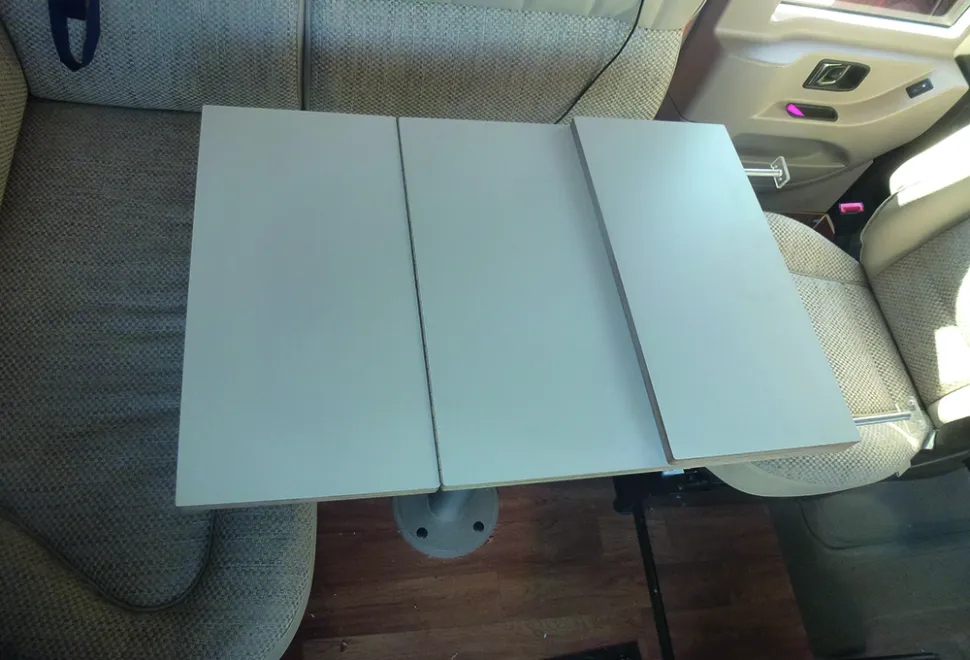
To extend the new table, you simply pull out the four corner supports then flip over the two extending leaves through 180 degrees.