
Solar powered motorhome fridges
SUN POWER FOR FRIDGES
Can a typical motorhome compressor fridge be powered just from a solar panel and, if so, how big does the panel need to be? Penguin Refrigeration carries out a month-long test to find out
The simple answer to the above question is yes, you can run a DC (direct current) compressor fridge in a motorhome from a solar panel (via a battery). But experienced motorhomers who have asked Penguin about using solar panels to power their motorhome fridge remain sceptical. So Penguin decided to run a dedicated test in a motorhome.
SETTING UP THE TEST VEHICLE
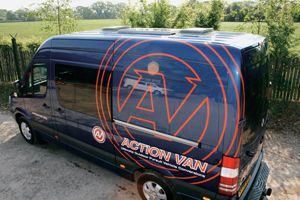
Penguin approached ActionVan, a local van converter specialising in custom conversions, which was enthusiastic of the idea of a self-sufficient fridge, as a fridge is the largest consumer on its DC electrical systems. So, being able to run the fridge solely from a solar panel would provide a truly independent motorhome, capable of wild camping for weeks at a time. The test vehicle was to be a MWB Mercedes Sprinter.
Penguin has three rules for specifying a fridge:
Ensure it has an efficient condensing unit powered by a DC compressor
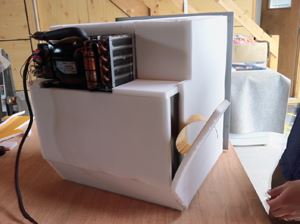
Although ventilation for a DC compressor fridge is important, it is not critical in the same way as a three-way fridge, which relies solely on convection for the cooling process. It also means you do not need fridge vents in the side of the vehicle. Compressor fridges use a fan to pull the air across the condenser so the key is to design your installation to encourage good airflow through the condenser of the cooling unit. The type of cooling unit is also very important. There are two types: the basic steel cage condenser or the aluminium-finned condenser. The aluminium-finned condenser is much like a car radiator with tightly packed aluminium fins providing a large surface area to dissipate the heat produced by the refrigeration process, making it much more efficient than the more basic steel cage condenser.
Use a quality, well-insulated cabinet with single evaporator
Insulation is another key factor in producing an efficient fridge. All fridge manufacturers use similar high-density polyurethane closed cell foam to insulate their cabinets and all are faced with a similar dilemma when designing a fridge. Put simply, if you double the insulation you double the efficiency. However, for the average campervan, optimising the insulation would mean barely enough room inside the fridge to store a pint of milk! So, to provide decent volume in a confined space, most manufacturers use approximately 40mm insulation and sacrifice some efficiency.
Optimise the volume for the motorhome
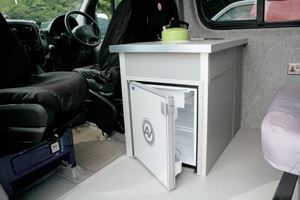
The final factor is the actual volume of the fridge. Cooling an 80-litre fridge takes significantly more power than a 40-litre one, so it is important to size the fridge accordingly. For the ActionVan Sprinter, a Vitrifrigo C62i 62-litre fridge was selected as it gave adequate volume for a larger touring motorhome within the compact kitchen arrangement necessary.
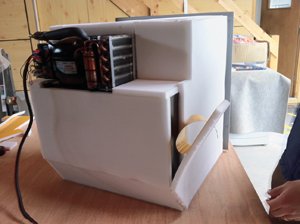 | 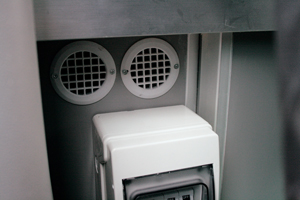 | 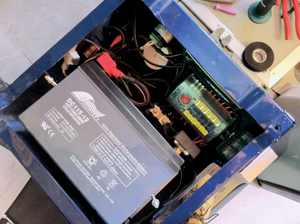 |
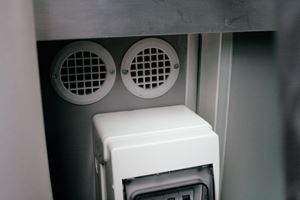
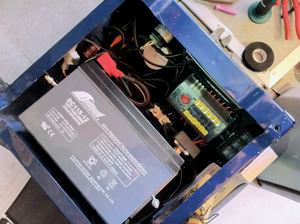
| Motorhome fridges are a compromise between insulation levels and interior space | Additional ventilation fitted to front of the unit to improve air flow from the compressor | Battery and DC wiring including fuse box, charger shunt and battery monitor all neatly fitted under passenger seat |
THE INSTALLATION
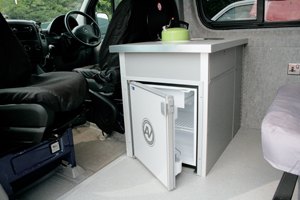
The kitchen unit is sited directly behind the driver’s seat. It has a sink and hob above, with fridge and storage cupboards below. The fridge was at the end of the unit, flush mounted, for easy access when sitting outside the van.
To ensure good ventilation, a section of the furniture panel directly behind the fridge compressor and cooling unit was removed and a neat wire grill fitted in its place. This allowed the warm air produced by the condenser to dissipate into the cupboards behind. To ensure this air was not trapped, further vents were fitted in the front of the cupboards (hidden behind the driver’s seat).
The other key consideration with a compressor fridge installation is electrical wiring. The compressor runs at 2.3A but can draw up to 12A momentarily on start-up so, to allow for this, Danfoss (the compressor manufacturer) specifies a minimum cable diameter of 2.5mm2 up to a maximum length of 2m, and then a mm2 per metre thereafter. The distance from battery to the fridge on the Sprinter was relatively short at 1.7m so 2.5mm2 cable was used.
SPECIFYING THE POWER SUPPLY
ActionVan works closely with Barden UK, which supplies components and power solutions for all its bespoke van conversions. For the Sprinter DC system it recommended a 12V 115 amp hr deep-cycle battery, charged via a 55W Solara S Series solar panel.
From its series of marine fridge tests, Penguin had previously established that, for fridges of 40 litres and up, you needed approximately one watt of solar power for every litre of fridge capacity. The question was whether this rule of thumb would still hold true for air-cooled motorhome fridges.
Using a 55W panel to run a 62-litre fridge should test this rule very well. To complete the standard installation a CTEK XS7000 (12V 7A) mains-powered battery charger was also fitted so, once the test was concluded, the system could also be charged from the engine alternator or through a mains hook-up as required.
FITTING THE ESSENTIALS
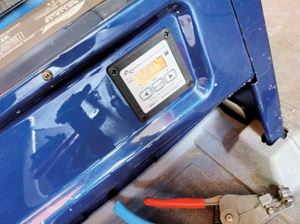
Using an AGM battery proved a real advantage as it could be mounted on its side allowing ActionVan to utilise the area inside the base of the passenger seat for all the DC power supply. The battery was fitted at the front of the base leaving plenty of space behind to fit the main DC fuse box, battery charger and the Studer battery monitor, which was mounted through the back of the seat base so the read out was easily visible.
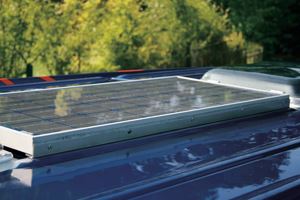
The solar panel was fitted lengthways between the two roof lights. It was attached using two aluminium angle brackets, riveted to the roof and sealed in place.
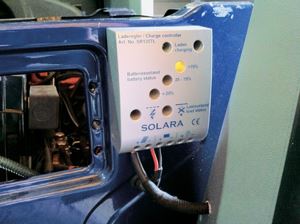
The cables were then run through a cable gland connecting into the regulator mounted on the side of the passenger seat. Wiring the panel into the electrical circuit was very straight forward, with two wires coming from the regulator connecting via the shunt to the battery positive and negative.
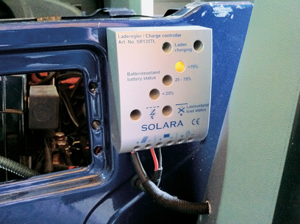 | 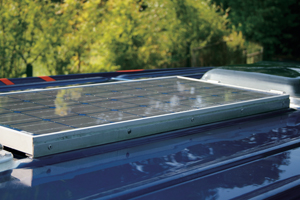 | 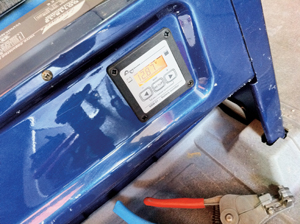 |
| Regulator for the solar panel fitted to side of seat base | The solar panel was fitted between two roof vents | This display allows the battery level to be monitored |
THE SYSTEM IN PRACTICE
The installation was completed in May 2011 and initially the weather was hot and sunny with average temperatures during the day well above 25 degrees C. However, towards the end of the test, the weather deteriorated with more cloud cover and several exceptional days that were overcast yet very hot and humid.
The fridge was used on a daily basis, during the week to keep sandwiches, water and milk cold, with heavier use over the weekends with two to four people using the campervan for surfing weekends away. The thermostat was set midway giving a constant measured temperature of 6 degrees C in the fridge. Over the weekends there was also occasional use of the stereo and the LED lighting.
Average Discharge (24 hours) = -14.9 Ah
Average Discharge (24 hours) = -12.8%
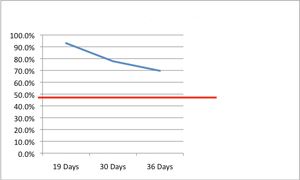
Over the 36-day test the only source of charge for the battery was from the 55W solar panel, which comfortably kept the battery condition well above its minimum (50 per cent), putting in more charge than the average daily discharge of 14.9 amp hr. The hot and humid weather towards the end of the test did reduce the charge input from the solar panel and a small reduction in the battery condition resulted (from 78 per cent to 70 per cent), but this was still well above the 50 per cent minimum and could easily have been reversed if the weather conditions had improved.
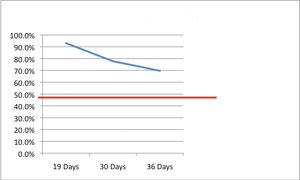 | 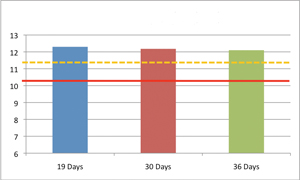 |
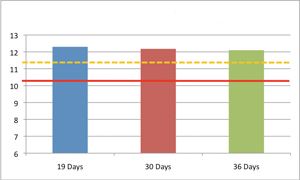
| MAIN BATTERY CONDITION (%) Red line: Critical battery level Blue line: Main battery condition (%) | MAIN BATTERY VOLTAGE (V) DC fridge built-in battery protection. Yellow dashed line: At 11.5V compressor will restart (default) Red line: At 10.5V fridge compressor will stop (default) |
CONCLUSION
The test proved that a correctly installed and ventilated DC compressor fridge can run constantly for well in excess of a month from a battery powered solely from a solar panel. To achieve this required a quality fridge cabinet, with single evaporator and an efficient condenser, combined with a deep-cycle AGM battery and a rigid solar panel. In fact, in this test the 55W solar panel gave enough power to run not just the 62-litre fridge but also the interior LED lights and a stereo.
It was quite an extreme test that Penguin Refrigeration undertook as, in normal use, a motorhome is rarely parked with the fridge running constantly for months at a time, totally reliant on a solar panel for charge. Normally a motorhome is on the move so the batteries can be charged from the engine alternator or, if parked for extended periods, the fridge would most likely be off or use hook-up.


