Motorhome advice: Base vehicle basics

If you believe everything the newspapers and the internet ‘experts’ say, you may think that a modern base vehicle is some kind of alien-built machine. That it’s so complicated there’s no point even attempting to look under the bonnet.
While it’s true that many of the engine senders and emission control equipment do need some special equipment to set up, the basic servicing and maintenance tasks have changed little in the last 50 years. Some things are even easier – like oil changes and brake pad replacement.
While we recommend main dealer servicing on vehicles still under a manufacturer’s warranty, for older motorhomes, there’s lots you can do to keep it well maintained.
Toolkit
Battery blues
Oil and filter servicing
Checking brake fluid and coolant
Wiper wonders
Low-mileage issues
Tyre checking
Going spare
Cambelts and timing chains
Other engine belts
Filling up with fuel
Fuel magnets and in-tank pellets
Electrical items
Rust and dent repairs
Bulb replacement
Toolkit
Having a few basic hand tools can make all the difference when you’re on the road. We’d suggest a modest socket set up to 19mm and a screwdriver that accepts individual bits, these need to include Torx head bits as most modern base vehicles use these star-shaped bolt heads. A Gerber-style of multi-tool, a pack of cable ties and a roll of duct tape are also useful emergency items. It’s also worth packing a small multimeter to pinpoint electrical issues.
Battery blues
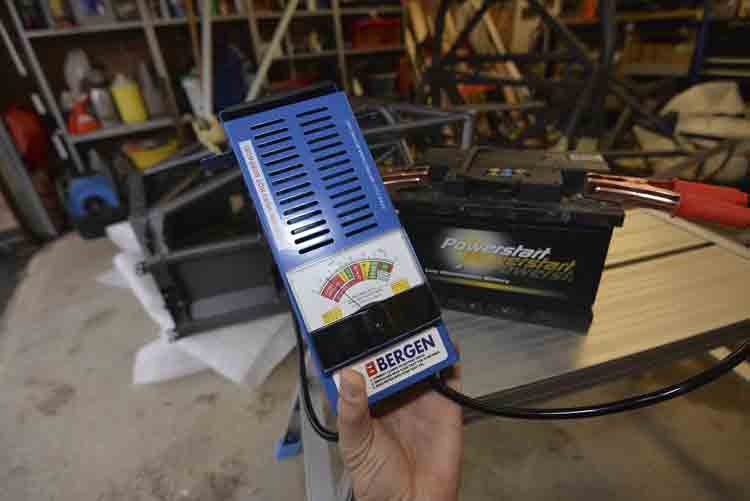
The most common AA call-out item after flat tyres is a flat battery. Leisure batteries are best left charged (and topped up regularly via a hook-up or solar panel over winter). If your main vehicle battery goes flat, then you’ll need to have it tested on a load meter to see if it’s healthy.
Low temperatures reduce battery voltage (and therefore increase the amount of amps drawn and hence the load on the battery), which is why starter batteries always tend to fail in winter. If in doubt about a battery, always check its voltage with a separate multimeter (do not rely on the motorhome’s control panel) and then load test it.
Oil and filter servicing
The best way to think of engine oil is that it’s the lifeblood of an engine. Just like an unfit human with a poor diet, if you neglect your oil, the oil’s pathways get clogged and problems can occur.
It’s critical to change oil and the oil filter – preferably for the original equipment branded item – at the manufacturer-specified intervals, at the very least.
Continuing with the human body analogy, think of the oil filter as the kidneys of the engine – if it gets blocked or clogged with dirt, bad things will happen!
Most motorhomes are based on a panel van that’s designed for intensive commercial use over a three or four-year period, typically at up to 100,000 miles. To keep fleet managers happy, base vehicle makers are under pressure to keep extending service intervals. Longer mileages between services keep the vans on the road for longer to improve efficiency.
Typically the service interval is set at 30,000 miles, or every 24 months for a modern Fiat Ducato, but this varies with model year so always check the owner’s manual of your particular vehicle. Long service intervals are not ideal for leisure vehicles, which are often used in a different way and rarely cover huge annual mileages.
Always use the genuine brand of oil filter and the oil specified in your owner’s manual. The same goes for fuel filters, air filters and pollen filters.
Checking brake fluid and coolant
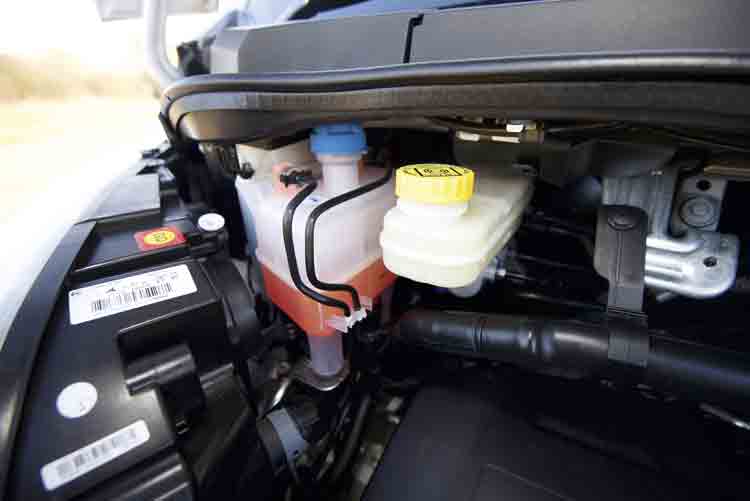
Your brake fluid and coolant levels should not need to be topped up between services, but you need to check the levels - their clear containers will be marked ‘min’ and ‘max’ on the side.
Both fluids should be of an even colour – all pink, all green, etc. If they’re a brown or muddy colour, or have any bits in them, you need to investigate further.
If the level of either reservoir has dropped significantly, ask yourself why. Are there puddles on the floor? Do the brakes feel OK? If in doubt, do not drive and ring your local garage for help.
Wiper wonders
Typically, windscreen wipers last around two years and, if you’re experiencing squeaks, smears or lots of fine lines with each sweep, then it is probably time for a new set.
Before you spend any money, though, try carefully cleaning the blades with a rag soaked in vinegar. It can often bring them back to life.
If you have an older van with the multi-section metal wipers, it’s a good idea to upgrade these to the modern all-plastic blade variety.
These cling to the screen better and work more effectively at sweeping water away. While you can buy replacement rubbers for just the edge of the blades for metal wipers, they’re very fiddly to fit and we’d not recommend them.
Most modern wipers simply click easily into place with the correct adaptor with no tools needed for removal or refit. Stick to either Bosch, Halfords or your OE brand.
Low-mileage issues
Low mileage and lack of use isn’t always a good thing and vehicles left standing over winter can sometime degrade in different ways to vehicles that have more regularly outings.
Tyres that are sat in one position for long periods can become flat spotted (though this is pretty rare and doesn’t happen over a single winter lay-up), while rubber components, such as coolant hoses and cambelts, can degrade with age.
If you can, take your motorhome for a short drive (until it’s warmed to its normal temperature) every week or two over winter lay-up.
Tyre checking
There are three things to check on your tyres: the tread depth, the sidewall condition and the pressure.
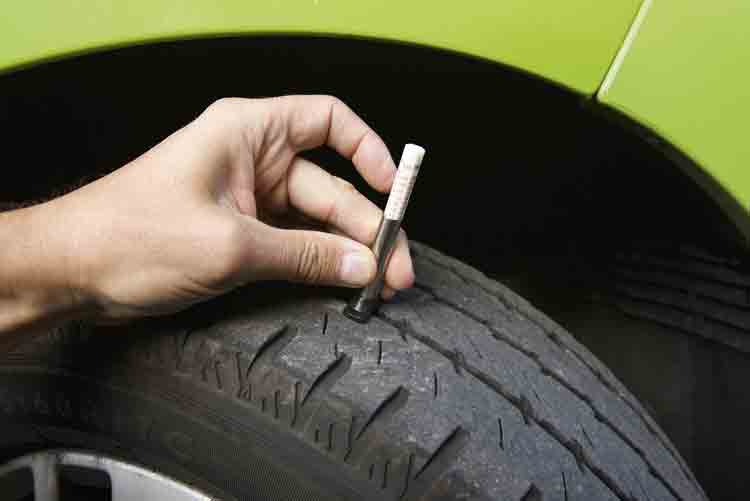
To pass an MoT, the tread depth needs to be 1.6mm within the central three-quarters of the width of the tyre and around the entire circumference of the tyre. You can buy tread depth tools inexpensively to measure this.
If you are under 3mm of tread depth and are planning a long journey, or need to travel over winter when the roads are wet and slippery, it might be wise to replace them early.
Tyres are the only thing in contact with the road, so pick a premium brand you’ve heard of, ideally in a Camping tyre spec (which often includes a mud and snow tread and reinforced sidewalls) and of the correct size, load and speed ratings.
To check the sidewall condition, inspect them for any signs of cracking, bulges or gashes. Any cut over 25mm long (or 10% of the section width) may result in an MoT failure, as will any visible ply or cord. For optimum handling, grip and longevity, the pressures need to be checked regularly – we’d suggest once a month or more and always before any long trip.
If you’ve not weighed the ’van on a weighbridge, you need to do this (weigh the front and rear axle separately) and then contact your tyre manufacturer for a recommended tyre pressure. Don’t assume the door jamb label fitted to your motorhome states the correct pressure – it may relate to the panel van base only.
Going spare
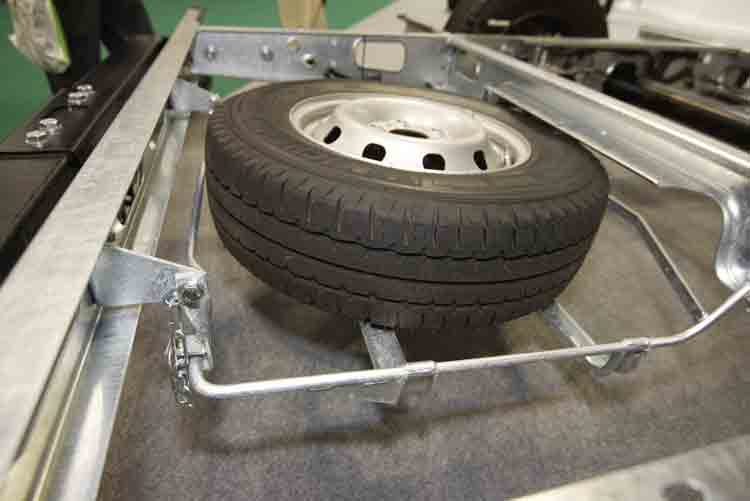
If you don’t have a spare wheel with your motorhome, get one – the sealant kits are only of limited use. Even if you don’t want to replace the wheel yourself (and motorhome wheels are big, heavy and awkward things) it will save you so much time having your own tyre on board.
Not all motorhome tyre sizes are always in stock at retailers in the UK and elsewhere in Europe and you don’t want to waste precious holiday time waiting for one to be shipped in. Plus, you will pay heavily for a distress purchase.
Cambelts and timing chains
All motorhome engines work in the same way. Both diesel and petrol engines rely on setting fire to a fuel/air mix (fired by compression in a diesel and by a spark plug in a petrol) to force a piston down. This turns the crank and drives the wheels via a set of gears (the gearbox).
Engines are in at least two halves: the cylinder head is at the top and has a series of valves to control when the fuel/air mix goes into the cylinder; the lower section is generally called the ‘bottom end’ and houses the cylinders and crank.
An ECU controls the fuel flow, but the connection between the bottom end and cylinder head is via a mechanical link.
This is either a reinforced belt – the cambelt – or gear wheels and a chain. Think of the cambelt/timing chain as the conductor of an orchestra – a vital part and if it goes awol, the instruments soon get out of tune. Imagine trombone players hitting the violins – you get the idea!
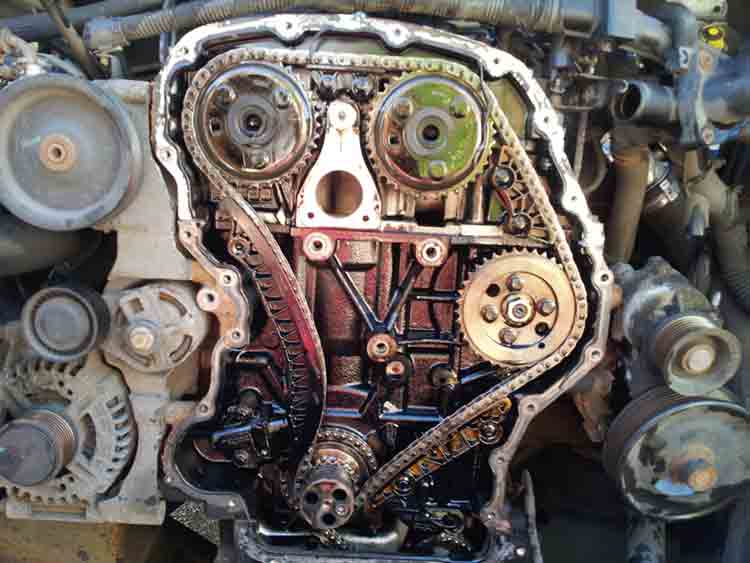
Timing chains generally last the lifetime of the vehicle so, if you have one, just check the replacement interval in your owner’s manual or ask your dealer. It may not have one, as they rarely fail. They do have tensioners that may need replacing, though, and they can stretch over time, so they’re not perfect.
Cambelts are seen by many internet experts as the devil. But they’re not. Cambelts are simpler to engineer than timing chains and are lighter and quieter. They’re an incredibly strong, toothed belt reinforced with fibres of either nylon, aramid, carbon-fibre or even Kevlar (as used in bulletproof vests). Change them at the time specified in the owner’s manual – irrespective of the vehicle mileage – and you should have no issues.
The cambelt often drives the water pump and runs in one or more tensioners – these are often also service items best replaced when the cambelt is changed. Makers often supply these as complete kits – like the Gates PowerGrip water pump kits.
The vast majority of modern diesel engines are interference engines. This means that the valves would hit the pistons if the timing – coordinated by the cambelt or timing chain – ever got out of sync. At best this will give you a bill in the thousands and at worst will write off the engine – so don’t ever miss a cambelt replacement interval!
If you have a vehicle that has an inspection cover, it’s easy to check the cambelt condition – you’re looking for wear on the teeth (or any change the profile shape) or hairline cracks in the surface. Usually, though, you can’t easily inspect the belt, so follow your owner’s manual to the letter.
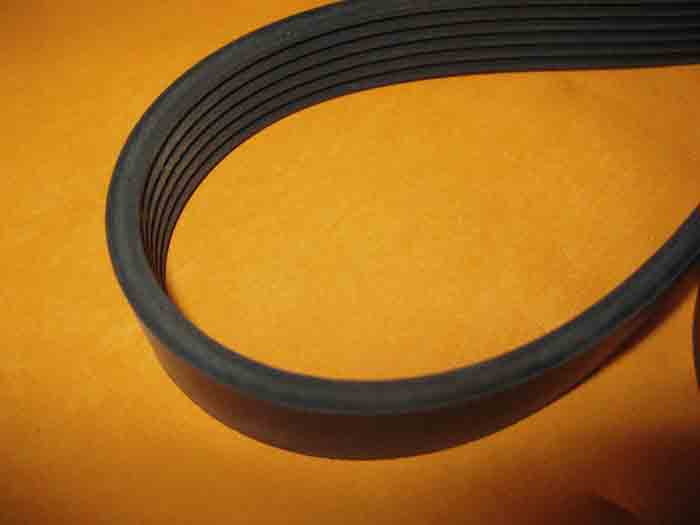
Other engine belts
Modern vehicles also have additional rubber belts to drive the alternator, air-conditioning compressor and power-steering pump. These often take a fairly tortuous path around various tensioners, etc. The advent of stop-start systems also puts these belts under more strain as the alternator also doubles as the starter motor and has to crank the engine over via this belt.
If these belts have any signs of cracking or scoring on them, replace them. It’s not an expensive job and so check at least every few years.
Filling up with fuel
A common internet myth is that supermarket fuel is inferior to fuel from the big brands such as Shell, Esso and Texaco, etc. It isn’t. Most fuel – petrol or diesel – comes from a handful of refineries and is shared between the forecourts.
There are various types of ‘premium’ fuels around at a premium price and these usually have additives, such as detergents, added at either refinery or forecourt.
Some of these have been shown to be beneficial to engines and cost-effective in terms of improving miles per gallon, but it is really down to individual choice whether you opt for standard or premium fuel. You will do no harm sticking to cheaper supermarket fuel.
Fuel magnets and in-tank pellets
Fuel magnets that clamp around the fuel rail and are said to ‘realign the fuel’s molecules for better combustion efficiency’ have been around for years. It’s a similar story with pellets that you place in the fuel tank.
We remain sceptical and have yet to see convincing proof of either product’s effectiveness.
With anything that’s added to the fuel tank or your engine bay, always refer to your owner’s manual for the base vehicle. If the device is not recommend by the base vehicle manufacturer, we would advise not fitting or using one.
Electrical items
Popping a fuse is one of the most common issues you’ll come across in a motorhome and there are two sets of fuses to be aware of.
The base vehicle will have a fuse board protecting its various circuits – such as the headlights, horn, heater motor, etc – and its location will be detailed in the owner’s manual.
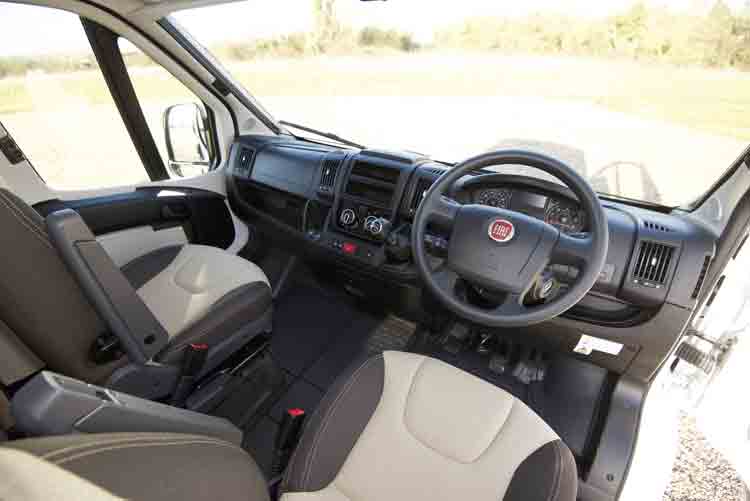
On 2006-2014 Fiat Ducatos/Peugeot Boxers/Citröen Relays, the fusebox is on the lower edge of the dashboard by the steering wheel, hidden behind a plastic panel secured by two crosshead screws.
On the current generation of Fiat Ducato it’s under a similar panel on the lower edge of the dashboard to the right of the steering wheel Some vehicles have the fusebox in the engine bay in a waterproof box (Renault Trafic) so always check and note the location for your particular base vehicle. You will need to access it at some point and this may well be on an unlit road in the dark and wet.
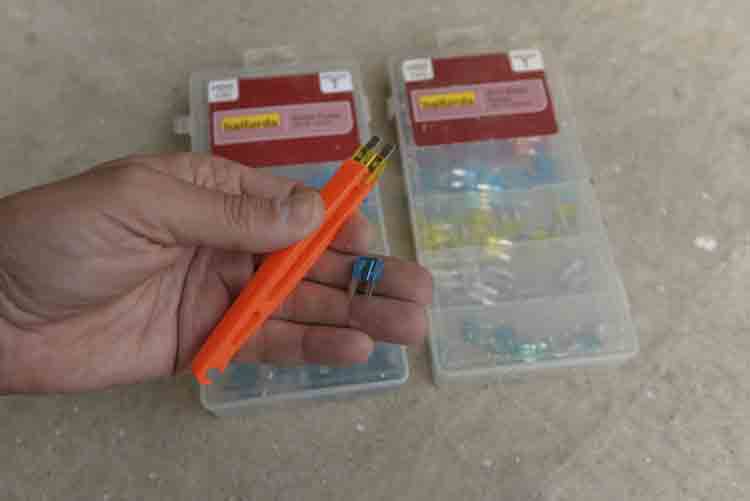
It’s worth locating the fusebox before you take any trip to see what kind of fuses it has. Some use traditional standard blade fuses, while some use mini-blade fuses. Both sizes are commonly available, but only buy them from a reputable supplier such as Halfords, RS Electronics or a main dealer. Pound shop fuses and cheap eBay fuses often have a higher resistance and may cause problems.
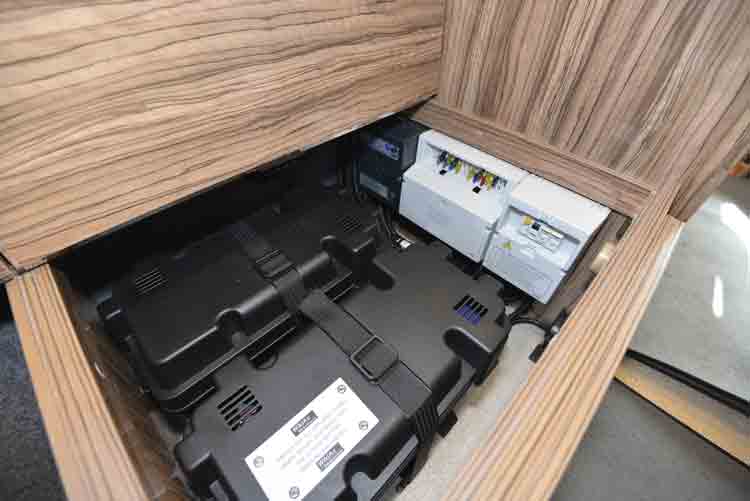
As well as your base vehicle fuses, the habitation section of the motorhome will also be protected by a series of fuses, usually in a bank of fuses and often built into an all-in-one charging system.
These fuseboxes can be in a variety of places depending on the conversion, but favourite locations are under the front seats, in a wardrobe, in an overhead locker or in a rear seat box base. Again refer to the manual from your motorhome converter.
Replacing fuses is a nail-breaking task (gents this may be one for you!) and it’s always easiest to use a fuse removal tool – little plastic tweezers. These are usually in a bright colour and located on the lid or next to the base vehicle fusebox.
Rust and dent repairs
Major rust repairs are a job for a professional bodyshop and will need attending to as the MoT has become increasingly tough in relation to rust anywhere near suspension pick-up points. Equally, bodywork damage and large scrapes or scratches are best left to a bodyshop.
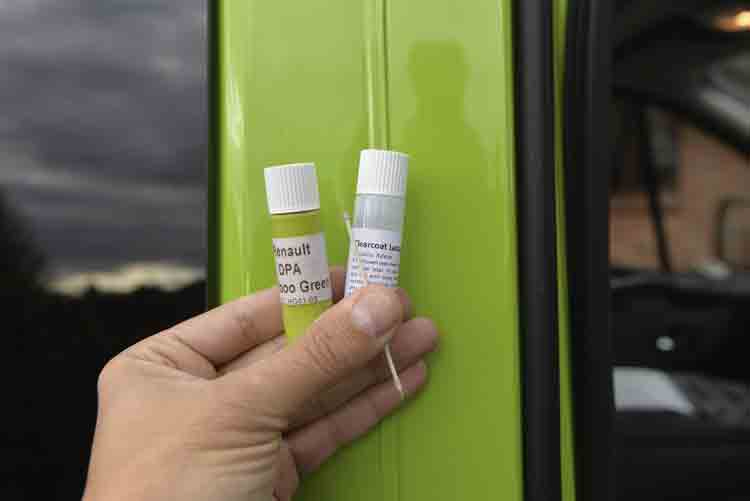
Stonechips are something that you need to stay on top of, to avoid a small chip spreading into something more unsightly and serious.
You can buy small touch-up pots of paint on the internet for under £10 but don’t use the mascara style brush they come with – either use a toothpick or a very fine paintbrush instead. Make sure you also add the topcoat clear lacquer if needed.
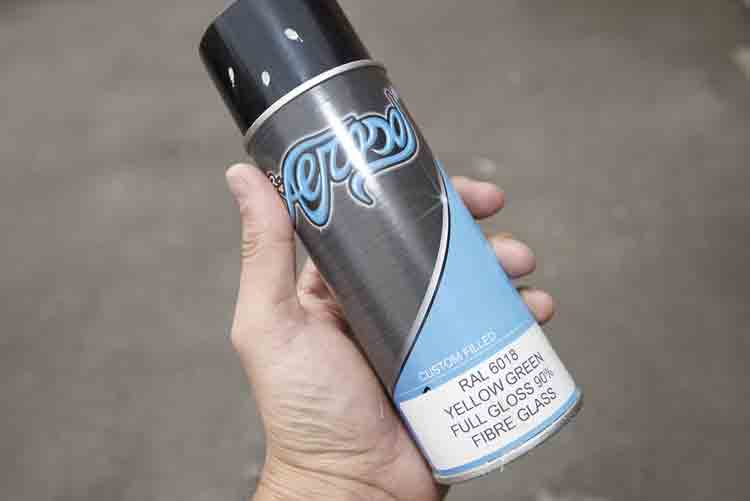
If you’re confident enough to try a larger repair then many local bodyshops will be able to custom fill an aerosol can for you in the colour of your vehicle. You need to give them your paint code, which is often on the chassis plate or on the door jamb.
Don’t buy a generic white paint – it won’t match as there are many shades of white, off white and cream used on motorhomes. Even on a Ducato the white paint colour can vary in shade from year to year, so don’t assume that an old can of paint from your previous motorhome will be the same shade.
Bulb replacement
Before any trip check all your sidelight, headlight, tail light, indicators and side marker lights work. Most bulbs can be easily replaced with a screwdriver, but it largely depends on what provision has been made by the converter.
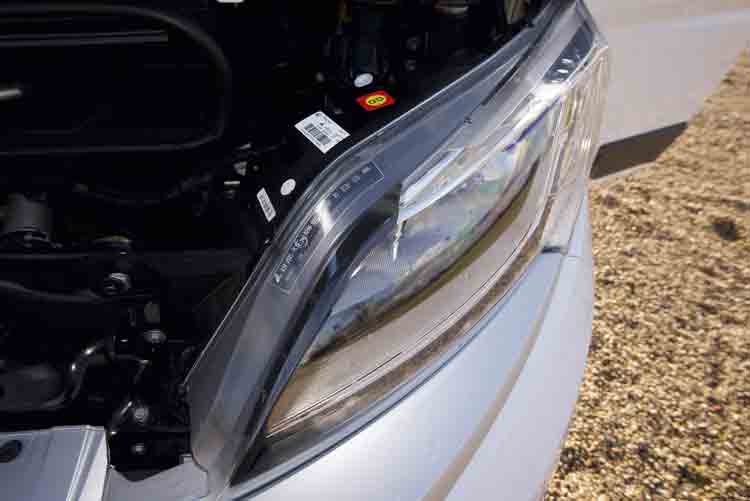
Base vehicle lights are easy to replace and the modern Fiat Ducato headlamp unit can be removed by simply undoing two screws. Rubber caps then lift up to reveal the headlight bulbs, which can be unclipped and replaced.
Make sure you know the position of your leisure batteries, fusebox and mains consumer unit.
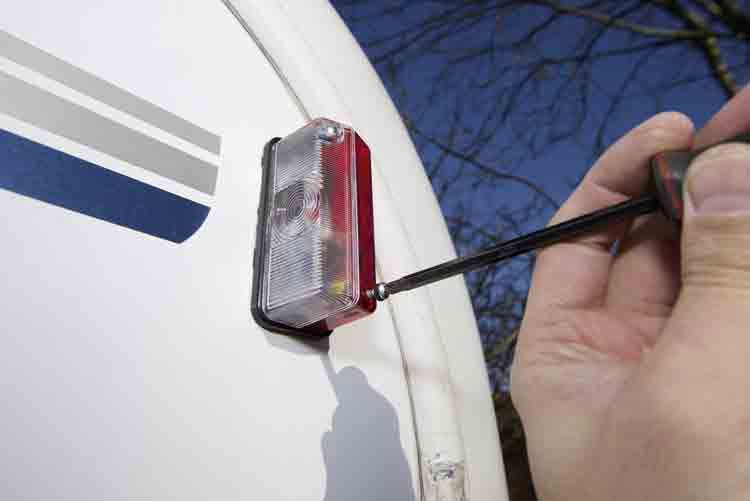
Side repeater light bulbs are easy to replace, but stand on a work platform to change them!
Tackle stonechips as soon as they appear. This handy touch-up kit from The Scratch Doctor has all you need in it.
A load tester - like this one pictured for £25 - is a simple way to check the health of a battery that won't hold charge.
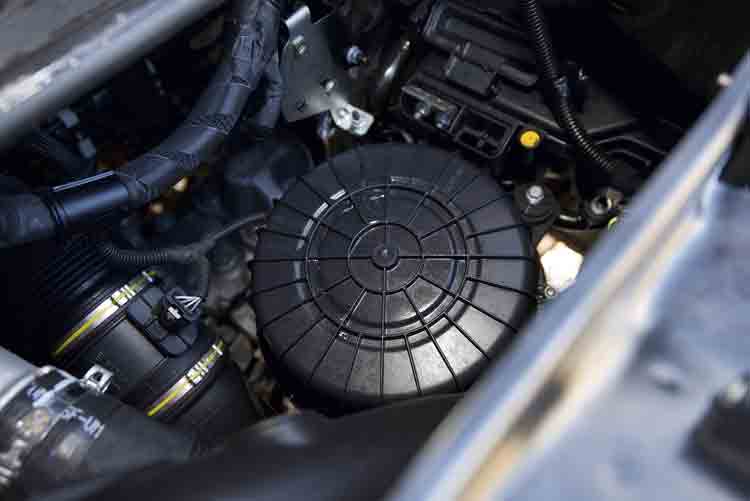
The air filter on a modern Ducato lives inside this plastic tub and is easy to replace on a DIY basis.
Always check your tyres regularly and not only their depth - also check their pressure and for damage in the sidewalls.
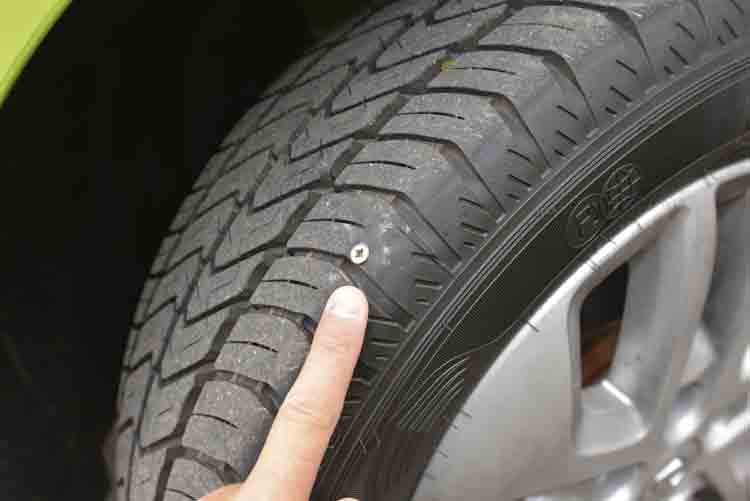
Check tyres for any foreign objects in them. This screw damage could not be repaired as it was so close to the sidewall and so a new tyre was needed.
The fusebox for a Fiat Ducato in the lower section of the dashboard behind a panel and with two crosshead screws in it (with white labels on the lid in this case).
Coolant (pink) and brake fluid reservoirs should have a single colour of fluid in them and rarely need topping up between services. If they're low, investigate why.
If your motorhome lacks a spare, it's worth getting one. Tyre sealant kits don't always work and tyres may not be readily available when you're abroad.
Common fuse types are standard blade fuses and mini-blade fuses. Use a fuse removal tool to swap blown ones and only use decent, branded ones.
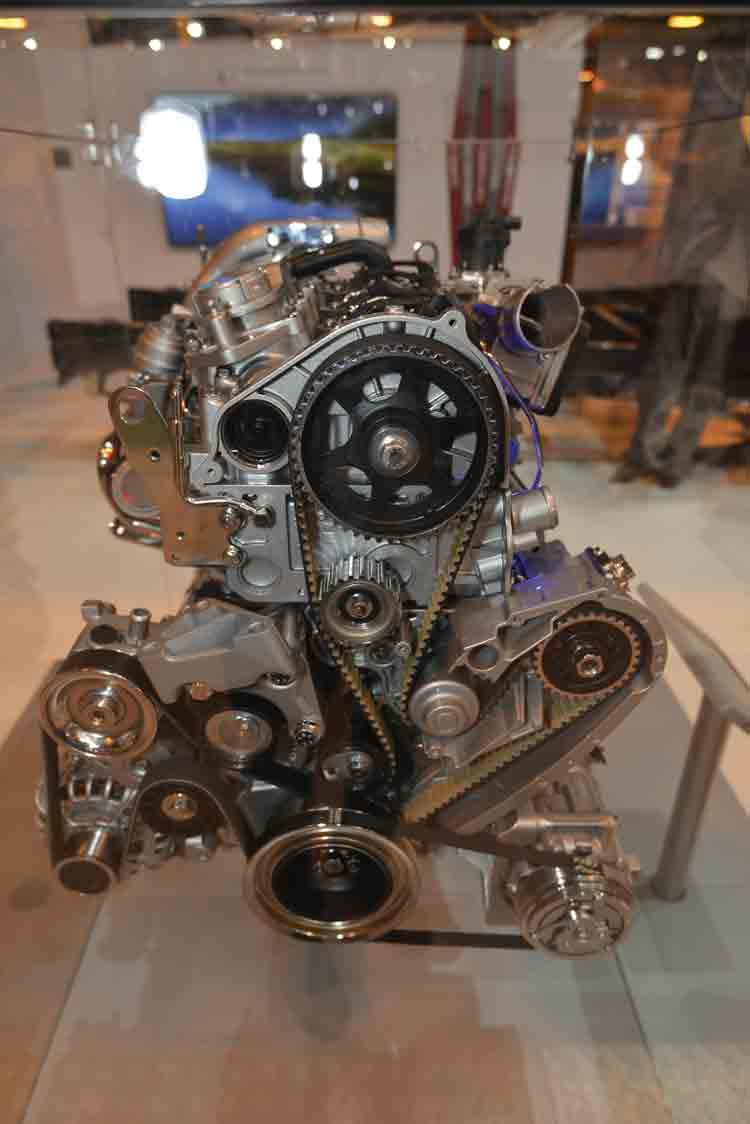
This Ford Transit engine uses a timing chain to connect the top and bottom of the engine. Chains generally need lees maintenance than cambelts.
The toothed belt seen here is the cambelt and must be replaced at the recommended intervals. Even if you have only covered low mileages, always replace the cambelt at the correct date.
Check all your lights are working and, if not, replace the relevant bulbs. This is often a simple job.
A local bodyshop supplier is the best place to buy paint and it can custom mix an aerosol in any paint colour.
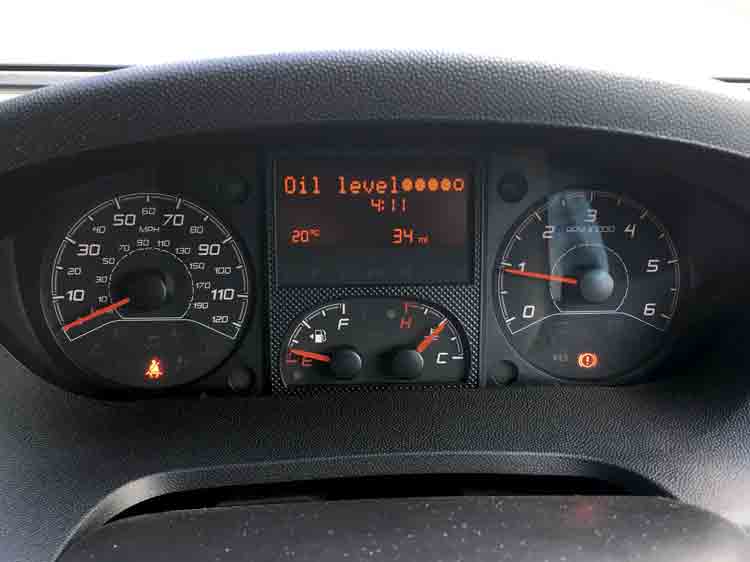
Modern vehicles generally tell you when they're low on oil, but it's better to regularly check it rather than risk a 'low oil' warning.
Ribbed multi V-belts (often wrongly called fan belts - modern fans are all electric) drive all the engine ancillaries and need to be checked for cracks.
If you found this article useful, make sure you read MMM magazine every month - it's packed with practical advice and technical questions answered. Get a digital subscription and browse and buy back issues copies here.