
All you need to know about caravan leisure batteries
Technical advice
Caravan leisure batteries: a complete guide
A caravan leisure battery is an essential component, powering your lights, appliances and other critical equipment. Unlike car batteries, which deliver short bursts of power to start engines, leisure batteries provide a steady energy supply over extended periods.
Choosing the right battery can significantly impact your caravanning experience, improving efficiency, reliability, and longevity. This guide explores leisure battery types, their advantages and limitations, how to choose the best one for your needs, charging considerations, common pitfalls and expert maintenance tips.
What is a leisure battery?
A leisure battery is a rechargeable deep-cycle battery designed to store energy and provide continuous power for appliances in a caravan, campervan or motorhome.
Unlike standard vehicle batteries, which are designed for short bursts of power, leisure batteries support prolonged energy delivery without degrading performance.
How do leisure batteries work?
Leisure batteries store 12V DC power, supplying electricity to lighting, refrigerators, water pumps and other essential on-board systems. They can be recharged via multiple sources, including:
- On-board chargers (installed in the caravan)
- Bench chargers (standalone external chargers)
- Mains hook-ups at campsites
- Solar panels with charge controllers
- Alternator charging from a tow vehicle
Proper charging, maintenance and monitoring are essential for maximising battery lifespan and performance.
Types of caravan leisure batteries
Different leisure battery types suit different needs.
Below are the most common options:
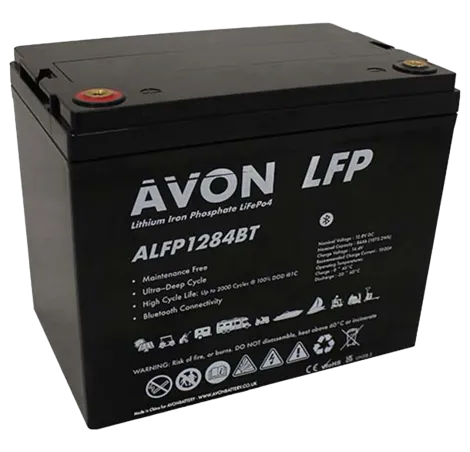
Lithium leisure batteries (LiFePO4)
Lithium (LiFePO4) batteries are the most advanced and long-lasting option, often seen as a game-changer for serious caravanners.
- Up to 50% lighter than lead acid batteries
- Can safely discharge to 10-20% capacity
- Accepts high charge rates, reducing downtime
- Lasts up to 10 years (3,000+ cycles)
- Maintains voltage stability under load
- Prevents overcharging, overheating and deep discharge
- Charging below 0°C can damage some lithium batteries (advanced models have built-in heaters)
- Not all require a ‘dedicated’ lithium charger, but charge profiles vary by manufacturer
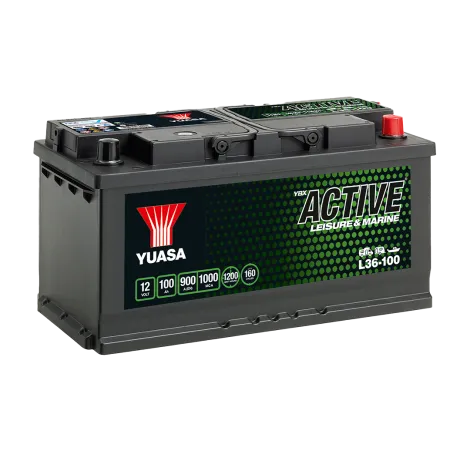
AGM (absorbent glass mat) batteries
- Popular due to durability and low maintenance
- Spill-proof, vibration-resistant, and deep-cycle capable
- Charges faster than traditional lead acid batteries
- Ideal for medium to heavy use
With AGM batteries being a widely searched term, they are a great mid-range option for caravanners.
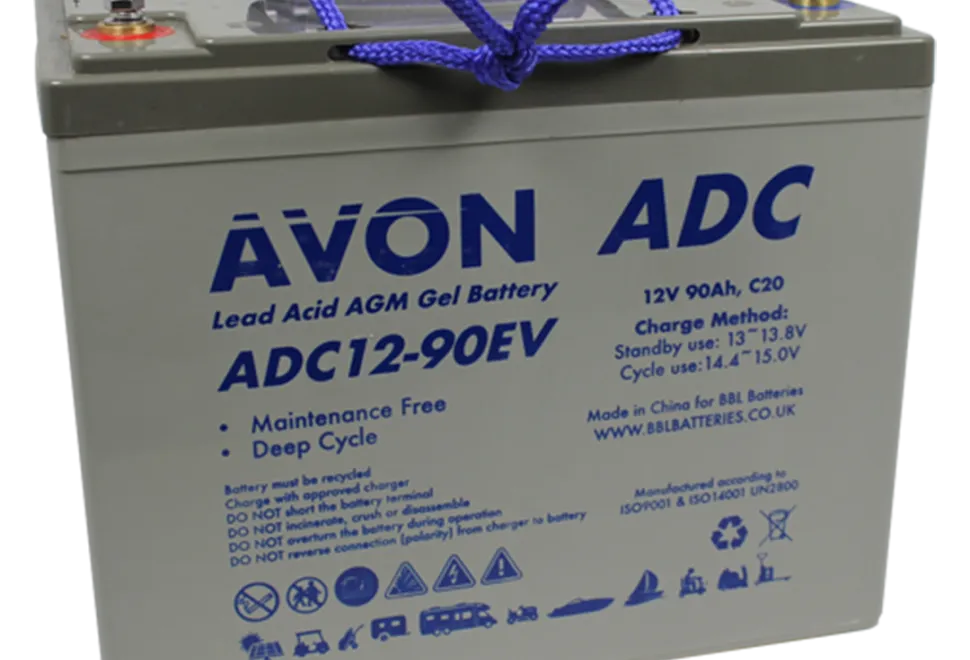
Gel batteries
- Uses gel electrolyte instead of liquid
- Maintenance-free and highly resistant to extreme conditions
- More expensive than lead acid but lasts longer
- Perfect for those who travel on rough terrain
A gel battery is a great alternative if you're looking for a sealed and vibration-resistant option.

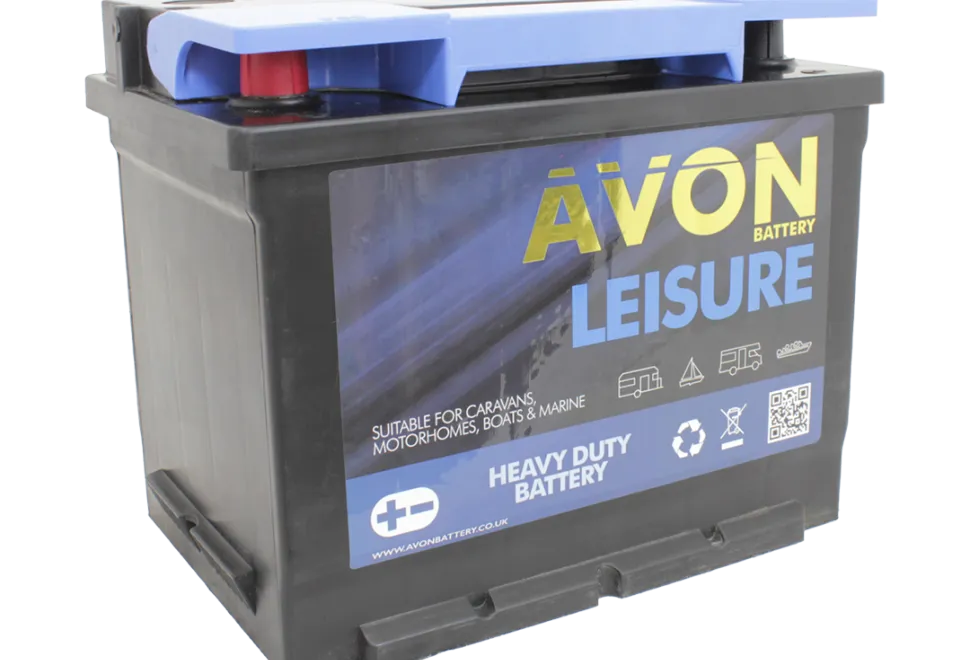
Lead acid batteries
- Budget-friendly
- Suitable for caravanners who use electrical hook-ups regularly
- Heavy and requires regular maintenance (for non-sealed versions)
- Lower lifespan compared to AGM and lithium
- Less efficient at deep discharge
The most affordable and widely available leisure battery type, available in flooded (wet cell), sealed and AGM variations.
Lead crystal batteries
- A newer, premium alternative to lead acid
- Longer lifespan and deeper discharge cycles
- Better performance in extreme temperatures
- Higher cost but lower self-discharge rate
While lead crystal batteries are less common, they offer greater resilience and efficiency than standard lead acid batteries.
Factors to consider when choosing a leisure battery
Battery capacity (Ah)
Higher amp-hour (Ah) capacity means more stored energy. Choose based on your power needs:
- 60-85Ah – Weekend trips with minimal power usage
- 85-110Ah – Standard caravanning, lights, TV and small appliances
- 110Ah+ – Extended off-grid stays with multiple appliances
Price vs performance
Lithium leisure batteries cost more but last longer, while lead acid batteries are cheaper but need frequent replacement.
Charging system compatibility
- Check the manufacturer’s charge rate recommendations
- Solar panels & charge controllers must be compatible with the chosen battery
Many believe lithium requires a dedicated charger – this is not always true. Some lithium batteries are compatible with standard lead acid charging profiles, while others need a higher charge rate for optimal performance.
Usage frequency
Frequent off-grid touring? Choose lithium or AGM. Occasional camper? A lead acid or gel battery will suffice.
Verified NCC ratings
The National Caravan Council (NCC) categorises batteries as:
- Category A – High-capacity, off-grid optimised
- Category B – Mixed-use, ideal for both campsites and off-grid
- Category C – Best for on-site stays with electrical hook-ups
Maintaining your leisure battery
Proper maintenance is crucial to ensuring the longevity and performance of your caravan's leisure battery. With the right care, a good-quality battery can last for several years, providing a reliable power source for your trips.
Charging your battery
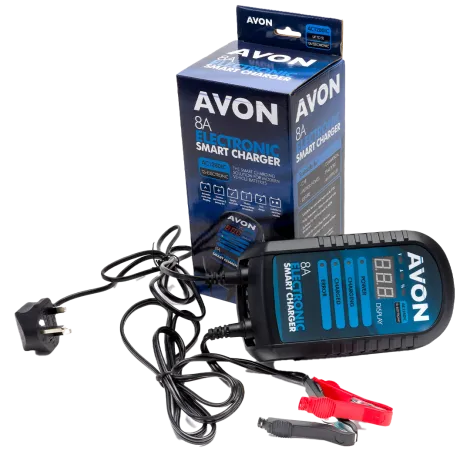
Proper charging extends battery life. Follow these tips:
- Avoid full discharge – for lead acid, recharge at 50% capacity; lithium can go lower
- Use a multi-stage charger – prevents overcharging and extends battery life
- Solar trickle charging – ensures battery health during storage
Storage & maintenance
- Store in a cool, dry location
- Charge every 4-6 weeks if not in use
- Clean terminals & apply anti-corrosion spray
- Use ventilated battery boxes for safety
Extending the life of your leisure battery
A well-maintained battery will last far longer than one that is neglected.
Avoiding common mistakes and understanding proper care techniques will ensure you get the most out of your leisure battery.
Overdischarging the battery
Lead acid batteries should not drop below 12.2V regularly, while lithium can go lower.
Some manufacturers (eg Truma) set safe discharge limits at 11.6V for certain batteries.
Partial or complete discharge
- Always recharge your battery as soon as possible after use
- If a lead acid battery remains discharged for an extended period, the sulphation process may become irreversible
- AGM and lithium batteries have lower self-discharge rates but still require regular monitoring
Leaving a battery in a partially discharged state for too long can lead to sulphation, where lead sulphate crystals form on the battery plates, reducing its ability to hold a charge.
Dry plates
- Check the fluid levels every few months and top up with distilled or deionised water as needed
- Never use tap water, as minerals and impurities can harm the battery’s internal chemistry
- Always wear safety equipment when handling lead acid batteries
For open lead acid batteries, the electrolyte level naturally decreases over time. If the fluid level drops too low, the battery plates can dry out, leading to internal damage.
How to test a leisure battery
To check battery health, use a digital voltmeter:
- 12.7V+ – fully charged
- 12.4V – 75% charged
- 12.2V – 50% charged (time to recharge!)
- 12.0V or lower – fully discharged (may cause permanent damage)

We asked the experts at BBL Batteries
How long does a leisure battery last?
A well-maintained leisure battery typically lasts between three and five years. Lifespan depends on usage patterns, depth of discharge, and charging habits. Regular maintenance, avoiding overdischarge, and using a smart charger can significantly extend battery life, keeping your power supply reliable during off-grid adventures or caravan trips.
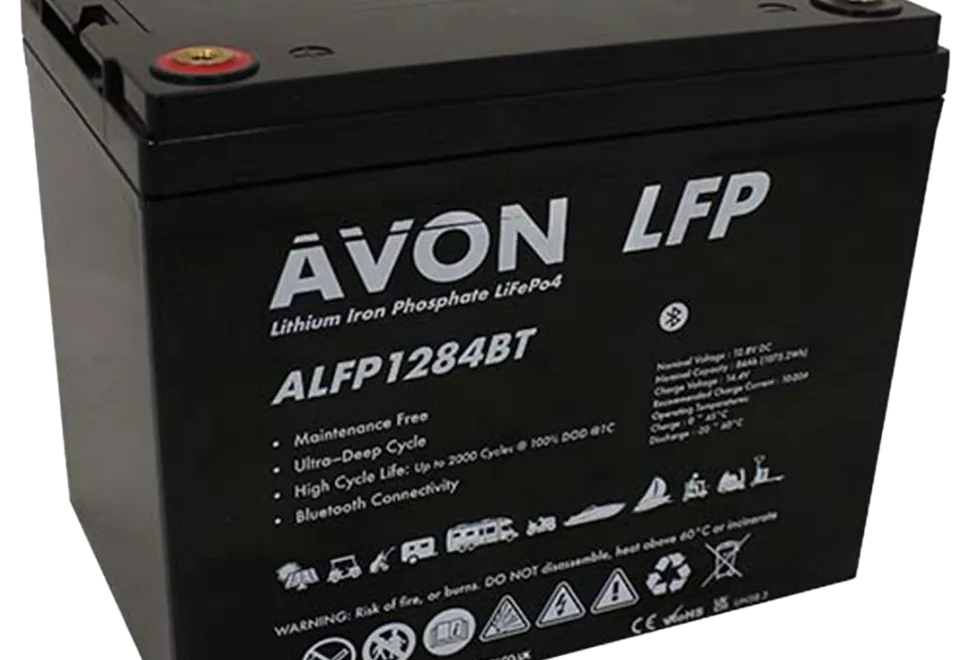
A premium-quality lithium leisure battery, such as the Avon LFP range, offers a significantly extended life by supporting many more charge cycles compared to traditional lead acid batteries. This increased cycle volume ensures longer usability, greater reliability, and reduced long-term replacement costs.
What size leisure battery do I need?
The right size of leisure battery depends on your energy usage. An 85Ah battery suits most caravans for basic appliances like lights and a fridge. If you use higher-draw devices or go off-grid often, consider 120Ah or larger. Calculate your daily consumption to choose the best capacity for your needs. Alternatively call the BBL Battery experts on 0808 168 0635 who will offer you the very best advice depending on your exact application and usage.
How to charge a leisure battery?
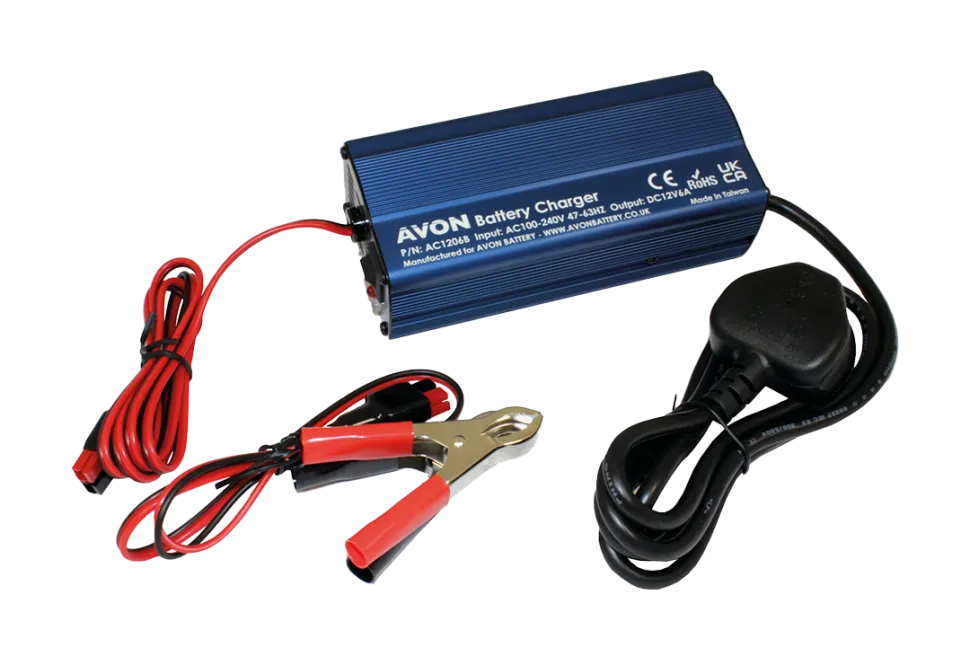
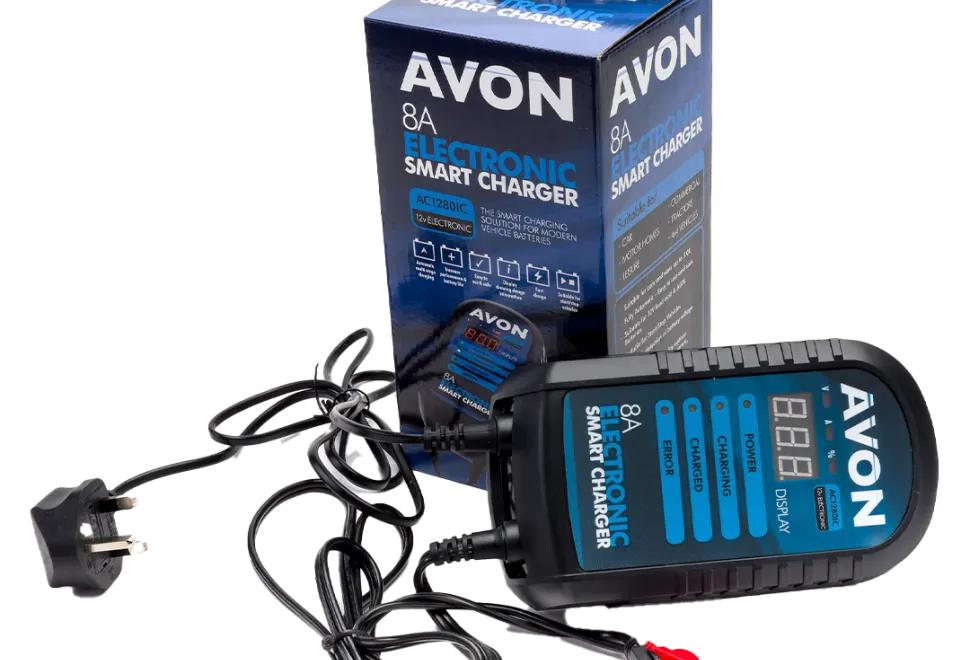
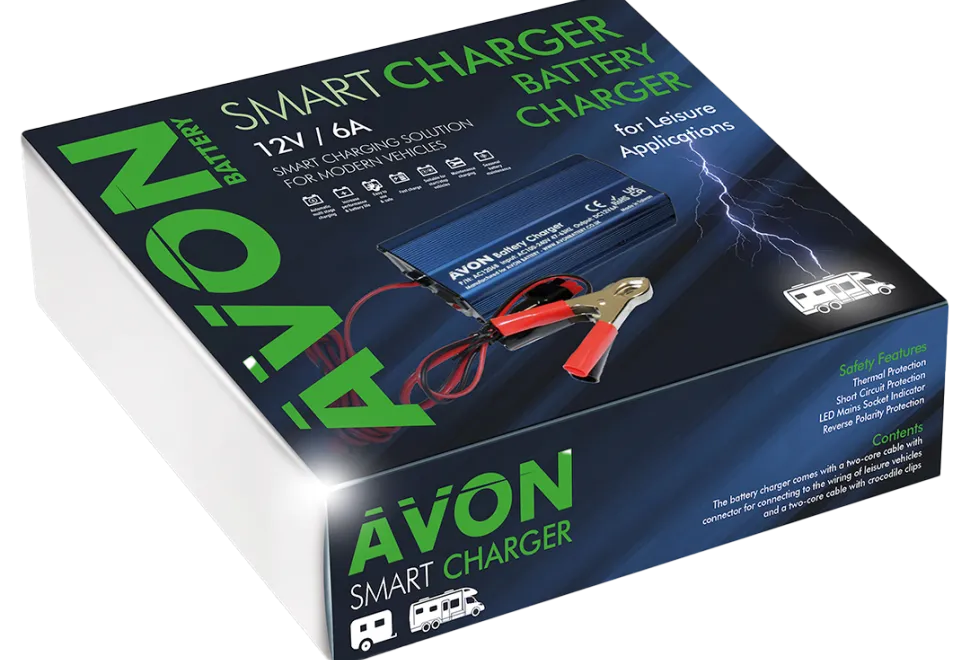
Leisure batteries can be charged via a mains smart charger, solar panel, or vehicle alternator. Quality smart chargers, such as the Avon AC1220B, are best for health and longevity. Solar is ideal for off-grid use. Ensure regular charging, avoid deep discharges, and never leave it flat — this helps maximise performance and lifespan.
What is the best leisure battery for a caravan?
AGM and lithium batteries are top choices for caravans. AGM offers good performance at a lower cost, while lithium is lighter, lasts longer, and charges faster. For frequent off-grid use, lithium is worth the investment. Choose deep-cycle types designed specifically for leisure applications for best results.

Final thoughts
Choosing the right caravan leisure battery ensures a reliable power source for your travels. Whether opting for a lead acid, AGM, gel or lithium leisure battery, understanding capacity, maintenance and performance helps extend battery life and enhance your caravan experience.
For frequent off-grid caravanners, investing in a high-quality lithium or AGM battery is recommended. Regular charging, maintenance and proper storage will ensure your leisure battery lasts longer and delivers optimal performance.
With the right caravan battery set-up, you can enjoy all the comforts of home – wherever your adventures take you!
BBL Batteries
T : 0808 168 0635 (freephone)
Latest caravan articles


Explore our magazines
Enjoy expert tech help, travel and campsite inspiration, buying advice, reviews, and more with our best-selling magazines and guides.

Buying Your Perfect Caravan
Buying Your Perfect Caravan is the ultimate guide to finding your ideal caravan. From layouts and storage to finance, insurance, and essential kits, it has everything you need to make your dream caravan adventure a reality.

Caravan magazine
Caravan magazine is perfect for caravan enthusiasts. Make the most of your caravan lifestyle with expert advice, unforgettable road trips, must-see attractions and top maintenance tips to keep your ‘van adventure ready.


