My motorhome project: Clearing a windscreen of debris

Words and photos by Stephen Walker
Sevel X250 type vehicles (and later models) accumulate debris in the windscreen rain channel. My Hymer suffers from being parked near to trees (even though they're positioned 50m away) that shed leaves and needles, which get deposited in the rain channel at the foot of the windscreen.
This creates a reservoir of rainwater on the driver’s side that finds its way into the engine bay via the seals. The two end sections only have a narrow-bore pipe to drain the rainwater and clog easily with sycamore seeds, pine needles, etc.
Cleaning the drain pipes is tricky, as they exit in the wheelarches. So, I came up with a solution and applied it to the driver’s side.
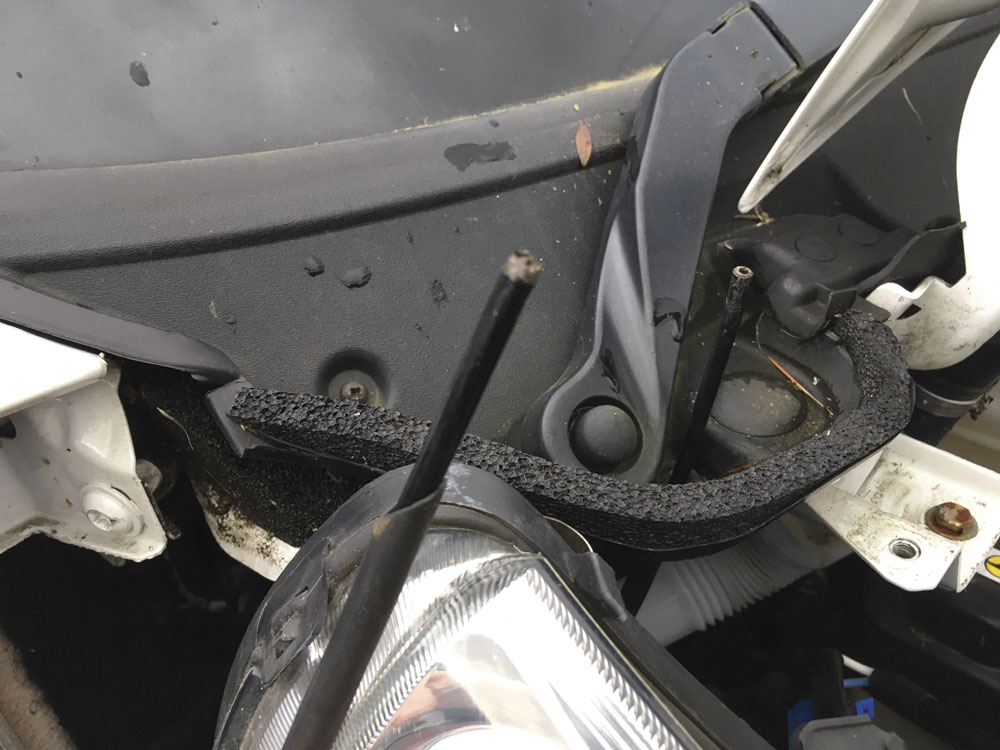
Remove the trim surrounding the headlight, above and below and remove the 10mm AF bolts securing the light unit. Pull the unit away from the motorhome – against a sprung bayonet socket at the top/rear of the light.
Pull the narrow-bore pipe out of the engine bay, leaving the moulded top in place in the rain channel.
You can now use a puff of lung power to blow the pipe clear or thread a stiff length of flex in from the end so that it pushes the blockage out at the top of the pipe. I used a length of outer brake cable from my bicycle bits box, but twin-core lighting flex would do the job just as well.
To simplify replacing the loose end of the flexible pipe, I have previously removed the large rubber drain pipe from the main channel below the screen and cut a T-shaped slot about 250mm (10in) from the circlip that holds the pipe to the channel.
The T-shaped slot (see photo with pencil indicating position) is on the outboard side of the pipe. You can now measure the narrow pipe against this and trim enough to allow you to push about 75mm (3in) into the large pipe. Make this cut at an angle to help reinserting the narrow pipe and avoid getting kinks in the pipe.
Once the job is complete, after replacing the headlight, it’s a simple job to clean out the muck next time.
With a smoother route for the pipe, just use your chosen flexible tool from above the channel, once the wiper has been parked out of the way. Be careful when you push debris through the pipe (see picture below), but once the pipe is slotted into the larger bore, the route is simpler and any debris will flush out.
Want to have your project featured in MMM? Submit your DIY project to help other readers improve their motorhome or campervan and earn some extra money motorhome.ma/diyproject


