Motorhome tech advice: the MMM team of experts solve your problems

In every issue of MMM, the magazine's team of experts answer your technical queries about motorhomes and campervans. If you've got a niggly problem that you need some help with, our team are available and armed with a wealth of motorhoming knowledge.
Read the latest technical questions from MMM readers below, with answers from the team. Got a technical question of your own? Then please do get in touch – they would love to hear from you. Please email our experts at [email protected] and we'll take it from there.
You can buy digital issues of MMM magazine here
The MMM panel of motorhome-owning experts solve your technical problems
Meet the MMM Tech Help Team:
Nick Fisher – Tech Help Editor and Base vehicle expert
Peter Rosenthal – General advice
Clive Mott – Electrical expert
Mike Hill – Bodywork expert
Barry Norris – Technical & legal advice
Brian Kirby – All round expert
Andy Harris – TV & 12V expert
Q Where can I get replacement rear lights for my Autocruise?
As an avid reader of MMM and a subscriber for the past four years, I wonder if you can help my wife and I.
My motorhome passed its recent MOT, but with some advisories, one of which is causing a few problems, concerning the rear indicator lights.
The advice was that some of the LEDs in the lights were not working, therefore giving a really dim light.
Although this is a large and reputable garage dealing with a lot of heavy vehicles, it is at a loss as to where to find these lights.
The motorhome is an Autocruise (Pioneer) Monet, on a Peugeot base and a 2,178cc turbo-diesel engine, first registered in May 2006.
Each rear light is separate with three on each side, and are round. The amber indicator ones have the following numbers on the lens, 20-01 (E1) 1252, written/stamped in the bottom of the circle.
Do these lenses and LEDs come as one unit, or are the LEDs brought as separate parts, and where can they be purchased?
Ron & Ann Twining
A
I used LED lamps extensively on our trucks and found that, as long as they were never disturbed, they were fine and achieved the reliability and long service that we expected. The slightest knock (that might not even have cracked a lens) was enough to allow moisture to get past the seals and LED lamps are even more sensitive to damp than incandescent bulbs and their holders. Eventually though, even the best lamps will get old and the seals will become brittle without any impact, so replacement becomes inevitable.
I don’t think that the garage concerned spent a lot of time looking into this beyond checking its normal catalogues or suppliers, which would probably include Britax and Hella, but there are dozens of suppliers for this kind of thing.
There appear to be two screws per lamp and these will unscrew to allow the module to be extracted from the chromed capsule. The individual LEDs are normally set onto a circuitboard and are not replaceable individually.
In order to get the right replacement unit, you need to measure the diameter of the lens and the distance between the screw hole centres. I found motorcaravanning.co.uk/shopuk/vehicle_lights.htm has LED lamps by NAS that are 95mm diameter. Could these be the ones for you?
I would suggest speaking to this firm to establish what you need once you have the dimensions at hand. There may also be some dealers around the UK that should be able to source the correct lamps for you, but they may be more expensive.
Often it is better to pay a little more to obtain something that is exactly right for the job.
Nick Fisher
Q Why does my fridge not work on mains?
My fridge is the problem. It will work while driving and it will work on gas. It seems to work on hook-up with the fridge door open but, as soon as fridge light goes out or door is closed, it stops working.
If I leave hook-up attached it will not fire up on gas.
Dave Hird
A It would help to have more details about the fridge – its make and model number are usually on a small panel inside the fridge.
Generally, when a fridge has automatic switching between modes then, as soon as the motorhome is connected to mains hook-up, it will switch to mains as the power source and stop operating on gas.
I believe you have a Thetford (Smart Energy Selection) fridge, which runs off gas, as well as 230V and 12V electricity.
First start by checking that all the chassis electrical connections are sound and that the various 12V supplies routed to the fridge are present and working when they should be. Pay attention to ground tabs. These can be found on the seven-pole terminal strip in the back of the fridge, normally accessible by removing the fridge grille vents or at the power board DC inputs.
This is a job for a technician with a multimeter to check out.
Clive Mott
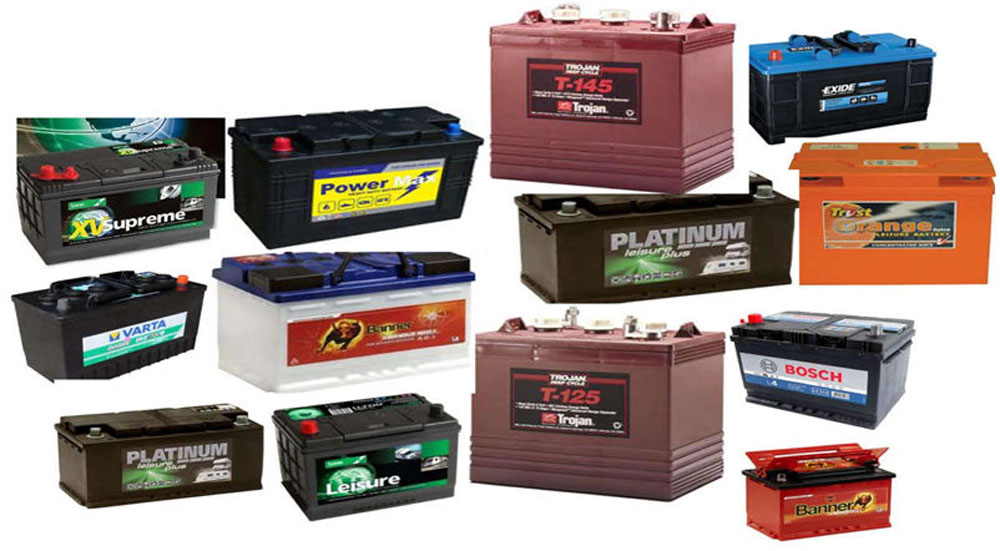
Q Can I swap my lead acid starter battery for an AGM type?
I have a VW campervan based on the 102 TDI Transporter T30 (2012 reg). Is it possible to change my lead acid 096 starter battery for an 096 AGM?
My habitation battery is an AGM and is kept topped up with an automatic seven-stage charger and I would like to be able to keep my starter battery topped up when the vehicle is not in use. I understand that this type of charger can only charge batteries in parallel if they are of the same type.
Jim Munford
A Do you know if your automatic seven-stage charger is set up for AGM or wet cell batteries? For example, the peak charging voltage for wet is 14.4V. For AGM it is 14.7V.
The specified replacement starter battery for your vehicle is, as you report, a 096 XD battery. This is a wet cell battery. Based on this I assume that the vehicle’s alternator is set up for wet cell batteries.
Consequently, you may have a situation where your leisure battery is not being fully charged when driving, but may well get fully charged when connected to a mains hook-up.
If you replace your starter battery with the AGM variant of the 096 then it will never become fully charged by driving. Indeed its life may be less than you’d expect from a wet cell battery.
But, if your seven-stage charger is connected to both batteries by a fuse-protected bridging link when the vehicle is not in regular use and this charger is configured for AGM, then both batteries will get fully charged.
The other alterative scenario is to change the leisure battery to a wet variety and set the seven-stage charger to the wet setting. This needs the same arrangement for the fuse-protected bridging link.
Clive Mott
I removed the AGM habitation battery and installed a sealed lead acid battery of similar spec to my starter battery and set my seven-stage smart habitation charger to lead acid.
My Zig control control panel has a car-caravan switch, so I connected a wire from the car end of the switch to the habitation charger and, hey presto, I can have both batteries on charge when the vehicle is not in use.
I have had it on test for several days and both batteries run cool and the charge voltage is a steady 13.2V when the charge is required.
Jim Munford
Q What power should my six-year-old Waeco compressor fridge be drawing?
I thought I would check what current my six-year-old Waeco MDC90 compressor fridge was drawing. Nominally, it is 48 watts, so I was expecting about four amps, but it showed 6.75A. Is this normal/reasonable?
Jim Whitston
A Manufacturers of compressor fridges try not to scare us users by disclosing the actual motor amps.
What they publish is the average current taken by the fridge. This based on the fact that the fridge thermostat switches the motor off when the fridge is down to temperature.
The proportion of time the fridge motor is running depends very much on a few factors, the ambient temperature, the set temperature and how often you take out cold and put in warm beer, ie, open that door, letting all the cold fall out.
Your measured current of 6.75A looks about right to me. The nominal wattage of 48W would represent this.
Clive Mott
Q Can I repair the rotary garage door locks on my Benimar Tessoro motorhome?
Two of the Quadro rotary locks on the garage of our Benimar Tessoro have jammed closed. Luckily, these were on the same door and I was able to open the door from inside the garage.
The key turns in the locks, but the handles do not spring out preventing the handles from turning, so it is the overall handle mechanism that has jammed. I lubricated the lock barrel with no success and so I have now replaced these two jammed locks with new ones.
Do you have any ideas as to why these locks have jammed and what can I do to prevent this happening to our four working locks in the future? There doesn’t seem to be any way to lubricate the mechanism of these locks as far as I can see.
Can the jammed locks be repaired? There is a circlip on the exposed end of the mechanism, but what would happen if I undid that?
Mike Batson
A I haven’t experienced problems with this type of lock, so I can only guess at possible causes. As it appears the lock barrel is functioning ok, it could be there is excessive friction on the plastic housing mechanism causing the sticking. Friction could be due to lack of lubrication or incorrect lubrication and perhaps the internal spring has lost tension with time.
Locks need to be lubricated but the wrong lubricant can attract dust and grime and clog up the works. For the metal lock barrel, it is essential you only use a dry type of lubricant to prevent clogging. Locksmiths tend to recommend graphite powder, which can be puffed into the lock or onto the key and this is then repeatedly inserted to get the powder inside. However, your experience does indicate the problem is with the plastic body of the lock.
The same caution needs to be taken with lubrication of the plastic body. A build-up of dust and grit over time will mean the internal spring is unable to overcome the friction and pop-out will not occur. In addition, some lubricants will react with certain plastics and one known reaction is for plastics to swell.
You, therefore, need to use a lubricant that is compatible with plastics. Silicone-based lubricants show excellent compatibility with most plastics. I have been unable to get a response from the lock manufacturer about lubrication and dismantling, no doubt due to the recent lockdown in Germany. So, without any advice from the lock manufacturer, I would recommend using Thetford’s Seal lubricant on the plastic mechanism. It’s recommended for lubricating the rubber seals on its cassette toilets and stated to be safe with plastics.
Once the propellant is dry a thin film of silicon is left on the sprayed surface.
Releasing the circlip you mention at the end of the old locks should allow the external plastic mechanism to be dismantled. As they are now redundant it is worth dismantling it to see if lubrication can restore life into the mechanism.
As for preventing this failure reoccurring, I suggest regularly wiping clean the plastic body as best you can and apply the Thetford silicone spray using the aerosol with a straw applicator to direct the spray to the base of the body in pop out position.
Barry Norris
I am sure Barry’s advice is sound and I have managed to free the locks using a method I devised. I freed the sticking handles using a thin blade and gentle persuasion and then filled the plastic body of the locks with WD40.
I left the locks overnight and the resulting liquid cleared out what looked like grease and muck. The locks then worked freely as they should. I checked them this morning (some weeks later) and they are working fine.
I am interested to hear what the lock manufacturer says about lubrication and maintenance of its locks.
Mike Batson
Q How can I get my cab radio to work on FM?
We have a 2017 Chausson 530 on a Ford Transit chassis with the basic radio. The FM reception has been poor since new.
Ford says it’s a Chausson problem and Chausson says it’s a Ford problem. The radio works fine on AM, but on FM the signal fades out as soon as you get out of built-up areas. We have had the radio changed but still the same poor reception.
The aerial is mounted on the wing on the driver’s side and has a yellow cable that goes through the bulkhead. At the radio end is a very skinny black cable that comes out of the wiring loom and into the radio. We have checked the continuity of this cable back to the aerial base and all is good.
We have added an aerial amplifier that works well on FM, but stops the good signal we had before on AM. The spec for the amplifier said it works on FM and AM but obviously does not work on AM. So, can you advise on an aerial amplifier that will work on FM and AM?
Roger Davey
A Some of the best radio reception I have ever experienced in a vehicle has been from a wing-mounted aerial, so this certainly doesn’t sound right. As you’ve changed the head unit and the fault persists that leads to only two remaining culprits: the wiring and the aerial itself.
As your vehicle is only three years old and may still be under warranty, the first port of call should be the supplying dealer.
If it’s out of warranty, the next thing I’d look at is the aerial itself – the Ford Transit normally has the aerial mounted on the roof, and Chausson has resited this on the upper edge of the front wing panel.
So, the first thing to check is that the aerial is getting a good earth grounding on the underside of the wing itself.
The next thing to check is if it is an amplified aerial or a non-amplified aerial (if it has a power feed connecting to a box anywhere between head unit and aerial it is powered).
Check this is getting power with a multimeter. Also check the continuity of the aerial lead itself – if it changes colour halfway along its length, it may have a bad splice.
You should be able to get crystal-clear FM with your vehicle so long as you don’t live in an especially mountainous area.
If you get stuck, I’d suggest visiting a local car audio specialist and getting them to have a look at it – you may need to replace the aerial or add a new amplifier but it shouldn’t be an expensive fix.
Peter Rosenthal
Q Why does my starter battery keep failing?
I hope you can help shed some light on my 2018 Elddis Accordo 120 Peugeot (which I purchased new in April 2018). In January I went to start it but, when I turned the ignition on, no lights came on. Needless to say, the battery was dead.
Now, when I last shut it down, I switched the ignition to the total isolate position.
I called the RAC out to start the vehicle. The technician got it started but recommend it went back to the dealer. They said a new battery was needed, which was fitted (not under warranty) I told them the battery was in the isolate position.
Six weeks later I went to give it a run out. I usually give it a run out every two or three weeks, but this was put back due to a hospital admission.
The same thing happened: zero life from the battery. I called the dealer and it sent a mechanic to jump-start it, which it did.
I was advised to give it a long run out, so I drove for two hours. When I arrived back at my storage site and parked it up, I turned off the ignition and tried to restart. However, zero life in the battery again.
I went back to the dealership, which said it’s a Peugeot problem.
I’ve been in touch with Peugeot Darlington. However due to the coronavirus, it has put the dates back twice now. I would like some advice when it finally goes into the garage.
John Drysdale
A The most straightforward thing to do is to lift the negative cable from the starter battery and connect a multimeter configured for measuring DC amps between the battery terminal and the lifted leads. This is what you need to do first. Quantify the problem.
I would not expect the quiescent starter battery current, when everything is turned off, to be more than 0.03A (30 milliamperes). At this level it will consume about 22Ah per month.
Some reasons for higher than expected amp figures are aftermarket alarms and aftermarket trackers.
As you have your vehicle in storage I would expect you to have either or both of these fitted either as OEM or aftermarket. It is worth noting that Elddis, unlike most others, fits OEM alarms and trackers powered by the leisure battery. Could yours not be wired as the manufacturer intended?
Lastly a great benefit of a decent-sized solar panel is that it is still useful during the winter to keep both starter and leisure batteries topped up. If you have a solar panel that only feeds the leisure battery then there are several ways to configure it to charge both.
A Battery Master is a fit-and-forget approach. A length or wire with a fuse in linking the positives of the leisure and starter batteries together when the vehicle is in storage is another. If in doubt, use a professional.
Clive Mott
Q Why will my cab fan only work when it is turned onto its maximum setting?
I have a 2015 Roller Team T740 on a Fiat Ducato. The fan only runs on setting four. Can you give me some advice why it won’t run on the one, two or three settings?
Brian Smith
A Not many questions can be answered with so much certainty, but this is your lucky day.
The speed selector switch on the dashboard connects to a resistor array under the passenger-side glovebox. Depending on the speed selected, the power is diverted through one of three resistive loads to reduce the speed of the fan to the desired setting.
If the only speed available is the maximum, the resistor unit has failed.
They are a bit fiddly to get at but, if you look up under the passenger side of the dashboard, you will find the motor unit and the resistor, which is secured with two screws. It slides out once the electrical plug is disconnected and the screws removed.
It is placed in that location so that it can benefit from the cooling air passing it as these resistors get hot.
Nick Fisher
Q Why do my dashboard glow plug lights on my 2014 Fiat Ducato only light up for a second?
I am converting a 2014 Fiat Ducato 2.3-litre van to a motorhome. I have had a full service plus new glow plugs fitted as there was a warning light on dash stating glow plug fault. The problem is the glow plug light just stops on for about a second then goes out. The van then turns over for a while and then starts.
I have checked the glow plug relay, which I think is OK. I also tested the connection plug that supplies power to the plugs, which showed the relay passing power to glow plugs for 15 seconds approx. I did this with a volt metre and heard relay click then no voltage to the connector. As it is standing while I convert it, I keep the battery charged and the battery is good.
It seems to make no difference if I wait for the relay to click or try starting as soon as the light on the dash goes out after about a second.
On a different note, I took the van to be painted yesterday and, as soon as I started travelling, it poured out smoke from the exhaust. I pulled over in my panic thinking it was possibly steam from sitting, but no. It also didn’t smell of oil burning either. After about 30 seconds of travelling it was as clear as a bell and ran as good as gold.
Terry Ewart
A The first point to make is that a glow plug warning message and light on the dash can be caused by an actual glow plug fault or the wiring to one of them but, by changing the plugs, you have sorted that out; which is good.
Under normal conditions, the glow plug lamp will only be lit for a second or so because it is not really needed at start unless the temperature is very low.
If the plugs are required, the light will still go out very quickly but may flash for about 20 seconds after starting while they continue to operate.
This is normal. In fact, glow plugs on common-rail diesels will be operated from time to time while the engine is running because they are part of an emissions-reduction process. They are no longer just for pre-heating before starting an engine!
The smoke that you describe is more worrying.
A 2014 vehicle is a Euro 5 and this means that it has definitely got a diesel particulate filter (DPF) in the exhaust system. These DPFs are designed to catch smoke and soot before they escape into the wild and only very serious smoking will be seen.
If there is too much smoke or soot for too long, it will clog up the DPF and cause warning lights and bigger problems so it needs to be remedied quickly.
The kind of smoking that you have described is normally the result of a problem with one or more injectors. They are prone to leaking. Not the visible kind of leak, but the kind where the nozzle continues to dribble fuel into the combustion chamber after it is switched off. It does not take much of this to cause a problem but – in this case – since the engine recovered on its own and there were no warning lamps; it could be an isolated incident.
I think that the first thing that you have to do is get some ‘common-rail injector cleaner’ and put it in the fuel tank as directed before going for an extended drive to get it through the system. This may cure a sticking injector.
If it happens again, you will not only need to get the injectors tested, but also get the DPF checked. This will warn of any impending problems and can be done using a diagnostic device. With the engine fully warmed up, the differential pressure between the front and rear of the DPF should be no more than 18 to 20 millibar (mb) at idle. Ideally around 10-12mb.
Hopefully this was a one-off and with a little TLC it may not become a major problem.
Nick Fisher
Q How do I stop reflections from the cab trim?
When driving, there is an annoying reflection from the top of the silver trim of the four ventilation grills on the dashboard onto the windscreen, in our recently bought Fiat Ducato Westfalia 2018. We did not have this problem in our previous Fiat Ducato as the grill was all black.
The reflection was not noticeable in the showroom, but I find it distracting, particularly when driving in sunshine. I had thought of hand painting, with matt black paint, the top triangular section as l would imagine the replacement cost of new black grills would be prohibitive.
Phil Huddart
A Many owners of Fiat-based motorhomes have been unhappy with the reflections on the windscreen that the silver vent covers can cause.
We had the upgraded dashboard option on all of our panel vans, which provided this added bling as a questionable bonus!
The answer is either to replace them with black Fiat options, or for a similar outlay, one of the commercially available kits to give a woodgrain, carbon fibre or whatever finish tickles your fancy.
I think in the first instance, I would be tempted to just apply some black insulation tape over the top surfaces to make sure that it is significantly better for you and would probably paint them in matt black. A matt lacquer over the paint will make it more durable and less likely to flake as time goes by.
Nick Fisher
Q Why does my step switch no longer work?
I have a 2016 Hymer Van 374, and the cab step switch has stopped working.
I’ve tested the switch – it’s working and has power Do you know where I can find the relay?
John Venier
A There are two types of electric arrangement about today that I am aware of. The system that has been around for many years is one where you need to keep your finger on the switch while the step operates, remove finger and the step stops.
The classic problem with these is the retract limit switch, which is built into the step mechanism, gets attacked by road muck and grime until eventually the switch contacts can no longer touch.
The more recent system uses a bit of electronics to provide a time delay and the operating switch is a one-touch requirement. Just one touch and it completes its movement. My Hymer is like this and your Hymer is only one year different to mine, so I asked Erwin Hymer Centre Travelworld for its advice.
Check there is power to the motor when the switch is pressed. Is the 12V signal being sent to the step? You’ll need to disconnect the multiplug at the step and use a multimeter for this.
Once you have taken the multiplug apart, you need to check terminals and, potentially (after disconnecting the leisure battery negative), clean them with a wire brush.
Also check the cable ends are not green and furry. If they are then these will need to be cut back until the copper is good.
Over 95% of the time the problem is a bad ground at the step itself. However, if the step motor is rusty then it might need replacing.
If in any doubt, use a professional motorhome technician.
Clive Mott
Q How do I clean my roof vent?
Does anyone have any idea how to clean the roof vent (pictured) on the inside of my motorhome? It has a double-glazed type interior, which is covered in dust.
I cannot seem to find anywhere that describes how to clean it on the inside.
Obviously, the interior and exterior surfaces are easy to keep clean, but it is between the two layers that looks – and is – grubby.
Chris Firth
A This rooflight is made by MPK. They are not very expensive to replace. The internal surfaces of the internal and external surfaces cannot be got to for cleaning as these are bonded together.
Once a new item is purchased it can be separated by the side handle screws (two on each side), therefore making the fitment of the lid only, without the frame, an easy fit.
I suppose if the old lid was removed in the same way it could be washed and submerged in water!
Units come in 300mm, 350mm, 400mm and 450mm sizes if you did want to source a replacement.
Mike Hill


