Motorhome Project: Making carpet for cab stepwells

Words and photos: Dave Coffey
Here I illustrate my very simple but effective change to our motorhome to make accessing the cab safer.
I first tried this on our motorhome some five years ago and it worked so well that I just had to do so again when we changed models recently.
My issue was that, in wet weather, getting in and out of the cab of the vehicle often resulted in a slip of the foot on the rather harsh plastic finish to the footstep, not to mention the occasional ‘squeaky noise’ that went with it.
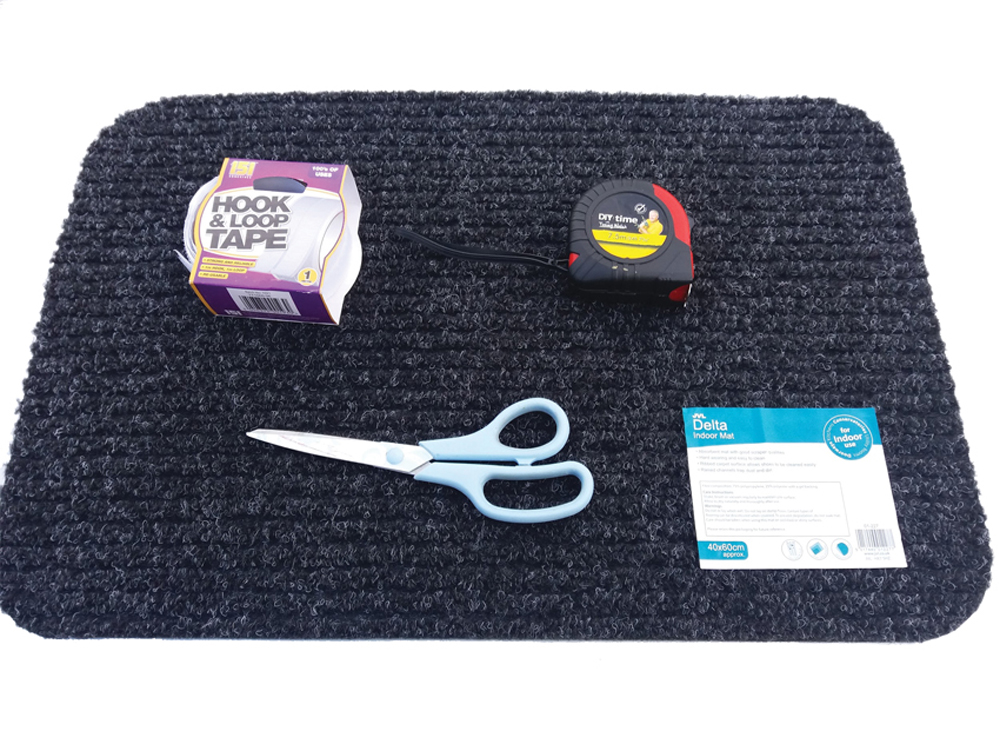 I purchased two roles of hook and loop strip at £1 each from my local pound shop. The carpet I used came from a hardwearing and rubber-backed household door mat, which cost £3.69 from a local hardware store.
I looked at a few different ones before choosing one that most closely matched the colour and texture of the cab carpet. I decided that the cord-type construction gives a better grip.
Clearly, these items are easily sourced and inexpensive.
I decided to use the hook and loop system of fixing so that the carpet step cover could easily be removed at a future date, if required.
The self-adhesive strips are very easy to cut and are really strong when fixed in place.
I started by giving the existing step a wipe with damp cloth and soapy water to remove any dirt, and allowed it to dry.
This provides the best possible surface for fixing to.
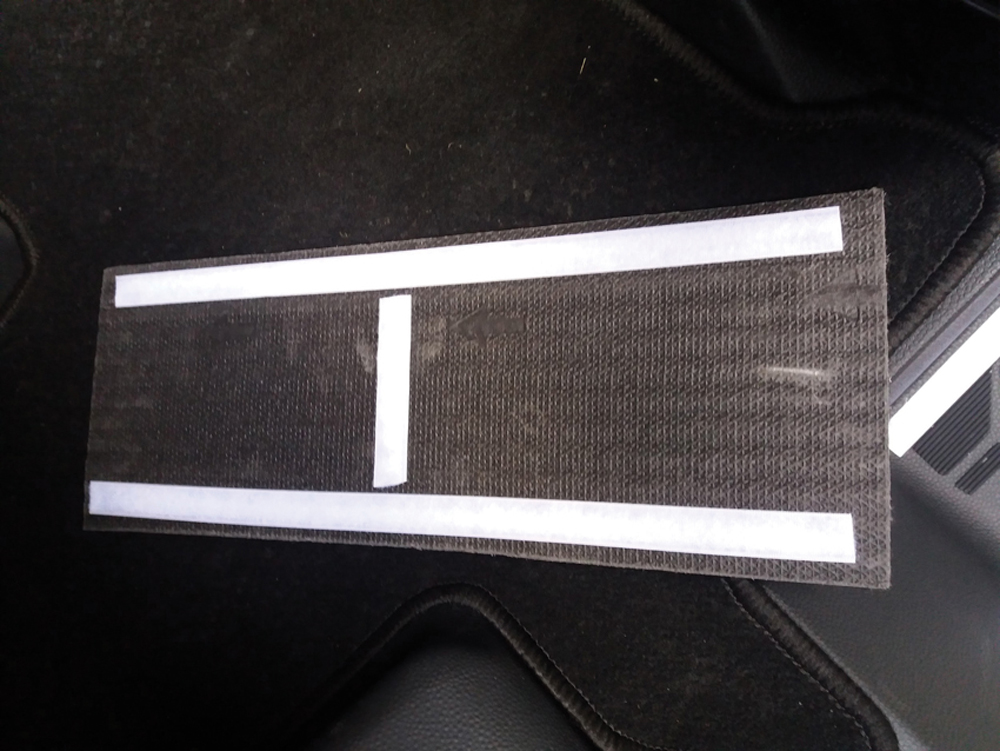
The hook part of the strips were then attached to the plastic step as shown in the photographs.
I measured the existing step and marked the required cuts of the rear of the carpet mat with a pen.
When measuring it is important to check that the carpet step, when in place, does not come into any conflict with the door in its closed position.
I was able to use a standard pair of scissors to cut the carpet.
Both passenger and driver’s side were taken from a single mat.
The opposing strip was then fixed to the underside of the carpet sections in the required position.
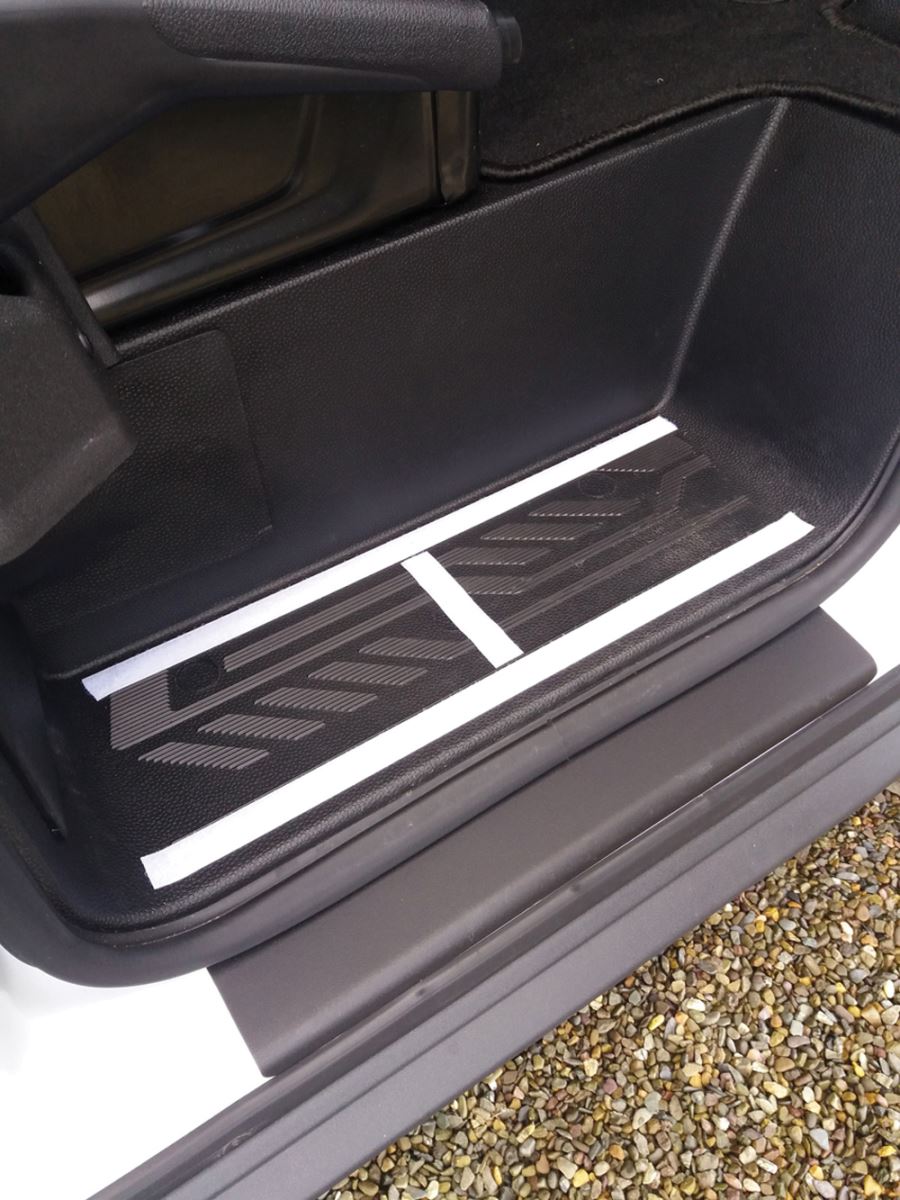
Both pieces of carpet were then placed into the required spots and nicely joined together.
I applied some pressure to the mats and then left to settle.
It is important to check again that the doors open and close without issue.
I have found that climbing in and out of the cab is now safer due to this very simple piece of work.
There is much more grip underfoot and it is safer all round.
Though I say it myself, I also think that the appearance of the carpet is tidier than the original finish.
It may not have been a complicated or technical fix, but I enjoyed getting it done. It took around half-an-hour of my time and came in at under £6!