Motorhome advice: Making a multi-use campervan table

Words and photos: Richard Phillips
We use our Nissan-based Lunar campervan for around 20 to 40 nights a year. During the very hot summer of 2018, we both felt that we would have liked to have had our meals and snacks outside. We always try to set up and use the single-leg Desmo table in the campervan as it only takes about one minute to fit. Otherwise we found that we were eating our meals on trays on our laps sitting in the front or rear seats. Not ideal!
Outside dining
It was impossible to eat outside because the stowed table at the back with a single stainless steel Desmo leg only had a one position fitting. This is situated inside behind the front seats for use in our elevated roof campervan, which has swivel cab seats.

So, I decided to design and make four simple ways of attaching our two-person table to the left, right and rear of the camper. This idea would also work on VWs, other types of camper and some motorhomes. The criteria was that it had to be simple and be able to accommodate a larger table if needed. This could be fitted by other owners with average ability and easily available tools. Of course, it had to look and work OK with the existing colour scheme, etc. I also did not want additional holes on the campervan.
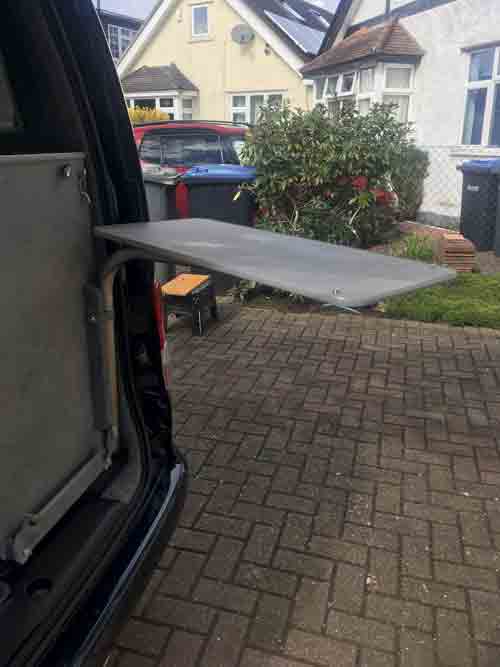
Position 1 – camper rear
I began at the rear of the camper and decided on small aluminium or steel angled brackets. I set up a temporary fitting, which did not look right and would also not have worked because the angles needed long slots in them to slide. Furthermore, the brackets stopped the table from being stowed away after use.
So, I visited a chandlery in a boatyard and purchased half-a-metre of 30mm x 3mm light grey strapping (other colours are available). This was very similar to the grey/blue interior of the campervan.
I also bought 12x15mm stainless steel boat canopy poppers for material, together with 12x15mm stainless steel poppers that can be screwed to wood. To fit these I bought a small installation tool kit, which came with instructions for fitting the material poppers to the strapping.
I then worked out the minimum length of strapping required for the two straps and cut and sealed each end with a hot knife heated on my kitchen gas hob. This was done to stop any fraying of the ends.
With the small tool kit I fitted a material popper to one end of the grey straps and a screw-down popper to the face of the stowage bottom plinth.
I next marked the position on the back of the table and fitted a screw-down popper to the top of the table. The strap then clips around the edges of the table to meet this in a U shape. I repeated the process on the other side.
This keeps both straps fairly tight and stops the table from moving up, down or sideways. The end of the table is resting on the top part of the bottom stowage plinth.
To keep things tidy when the table is in this stowed position, both straps are simply popped onto the underside of the table poppers.

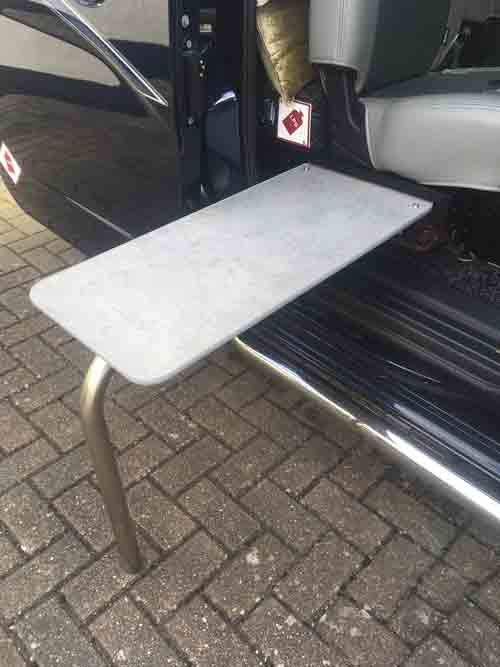
Position 2 – camper rear 2
For the second, higher position of the table at the rear of the camper, I removed the existing strap’s screw-down popper on the stainless-steel leg and repositioned the original dark grey strap to the top of the leg stowage plinth. The only other issue was that the boatyard gave me a 2mm longer screw, which I used on the black knob of the stainless-steel leg. This secures the table more firmly in any position and stops it moving or swinging about.
Positions 3 and 4 – sides of campervan
The third and fourth positions on the left and right sides are mirrored.
From some spare wood, I selected a 20mm-thick offcut and cut out two sections measuring 65mm x 520mm.
I then marked out a slot 25mm x 380mm on the centre line of each piece of wood. I carefully chain-drilled four positions for a handsaw and cut along the marked lines. With a wood chisel I cut the four end positions and cleaned the slots with a millicut wood file.
If this is not available, use 60 or 80 grit sandpaper, or emery cloth wrapped on a piece of thinner wood. I then used 250 and 300 grit to smooth and round off any sharp edges.
I marked out, drilled and countersunk holes for fitting to the side of the gas box. I then painted both pieces of wood with black gloss paint to match the interior metalwork.
I also cut two pieces of black Formica-type material and glued them to the bottom of the wood slots (I used UHU but any similar adhesive will do). This enables the table to slide into the slot without scraping off any paint.
To enable the top to be slid into the slot easily, it’s 5mm wider than the tabletop and 3mm taller. This holds the top firmly. It is also preferable to use good-quality smooth wood.
These slotted wooden supports were then screwed onto the gas box making sure that there was enough clearance with the side door fully open and that entry was not obstructed with the table in place. Make sure that you only use wood screws of the length of two-thirds maximum of the thickness of the gas box and seal up any holes to avoid gas escape in the event of a leak. Alternatively they could be glued in place.
I then fitted small angled brackets to the back furthest end of this support and, using card templates, worked out some brackets.
I then got flat 8mm-thick UPVC sections and also 6mm-thick 90-degree angled sections that were offcuts from a local firm. I cut these and bolted them to the seatbases to hold the wooden table slot sections. To finish, I rubbed down the white plastic, sprayed them black and bolted them in place with M6 and M8 bolts.
Campervan table - the details
Total spend: £10.20
How long the project took: Seriously, it took longer to write this up and take the photos. The task completion time was two days.
Project summary: To make the stock table more versatile, I devised four different ways to fit it. Using the table in these positions prevented no problems and we can now eat outside the campervan whenever the weather allows. This could easily work with other people's campervans, even if only fitted in one of these positions.


