Motorhome advice: How to improve a motorhome's bed in one easy step

James Turner, a reader of MMM magazine – Britain best-selling motorhome magazine – reveals how adding a simple and relatively cheap 'dry-mat' has vastly improved the comfort of his motorhome's bed
One of the features that attracted us to our Challenger Genesis 190 while in France (it’s the same as a Chausson 510, but not sold in the UK) was the drop-down double bed over the lounge. This layout provides a large table and daytime space, keeping the overall length down.
At bedtime, the table’s lowered electrically into the footwell, then the bed is lowered (also electrically) from its position in the roof, settling just above settee height, so providing easy access for the not-so-young.
The drawback, when compared to ’vans with a fixed bed, is that the mattress isn’t very thick, and you can feel the wooden battens when you lie down. We thought of changing the mattress for a thicker one, but the problem is that when the bed is stowed away in its raised daytime mode, it would be too low.
The hunt was on for something that would significantly improve comfort, but at the same time wasn’t so thick as to adversely affect the ceiling height.
Browsing around the Southampton Boat Show last year I spotted an under-mattress addition called Dry-Mat from Shipshape World.
Dry-Mat’s main purpose is to reduce condensation that collects under boat mattresses, where there’s often an enclosed space. This may be a benefit if you have a fixed bed over an enclosed locker but, for our camper, where the bed is out in the open, condensation isn’t an issue.
What attracted me to try Dry-Mat was the demonstration by the salesman of how weight is spread across a large area, far more effectively than slats. Indeed, in some racing yachts, where weight is at a premium, sailors sleep on two layers of Dry-Mat, with no mattress at all.
Dry-Mat is a 10mm thick layer of thousands of individual micro-springs that allow air to circulate between your mattress and bed base. I thought it was worth a try, so parted with my £60 and got busy installing it – which was a piece of cake.
It took around 10 minutes to fit Dry-Mat. The first test was a month-long tour of France and Spain in January. The difference in comfort is, well, huge. Prior to fitting it, the bed was OK, but I often got uncomfortable in the night.
Adding Dry-Mat has made a real difference. You can no longer feel any of the battens. Being only 10mm think, you don’t notice the difference in the stowed position of the bed.
Would I recommend Dry-Mat? Certainly. Indeed, I wouldn’t want to ever be without it in our camper.
Step 1
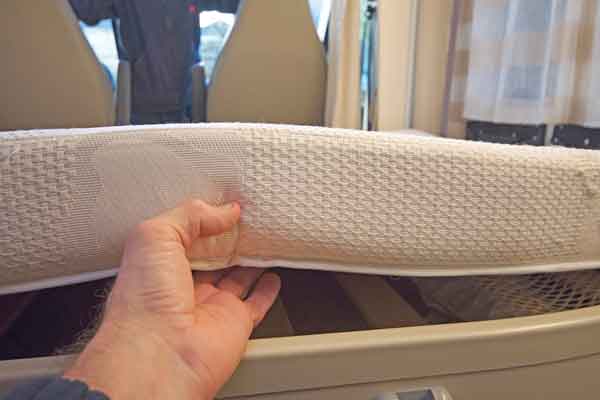
The original mattress isn’t the thickest in the world and is just a layer of foam
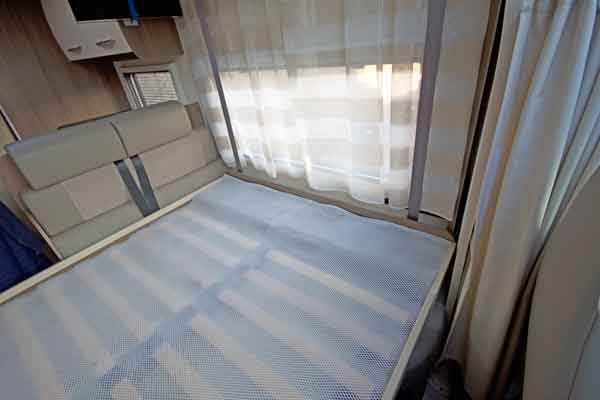
Step 2
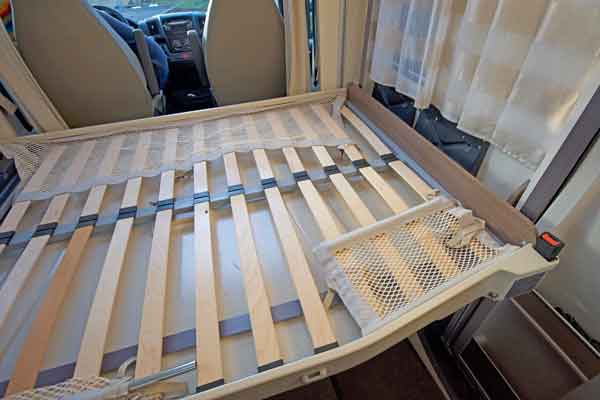
It sits on top of these wooden slats and you can feel these when you lie on your side in bed
Step 3
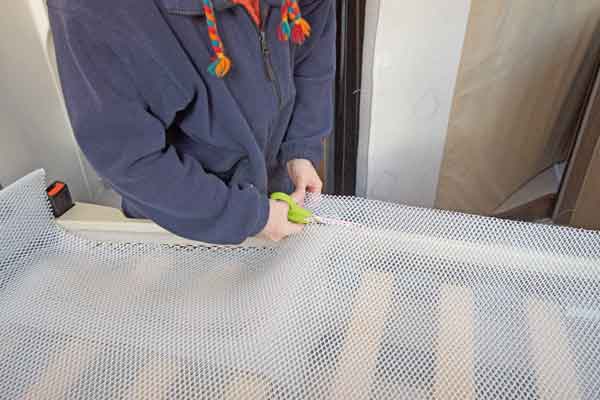
Remove the original mattress and, using sharp scissors, trim the edges of the Dry-Mat to suit your bed size
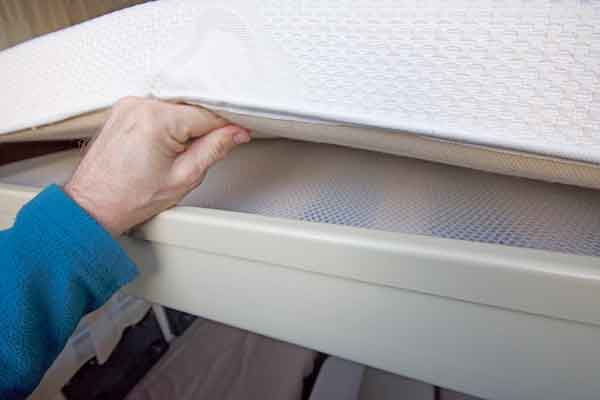
Step 4
The Dry-Mat is only 10mm thick, but it spreads the weight over a large area and hugely increases comfort
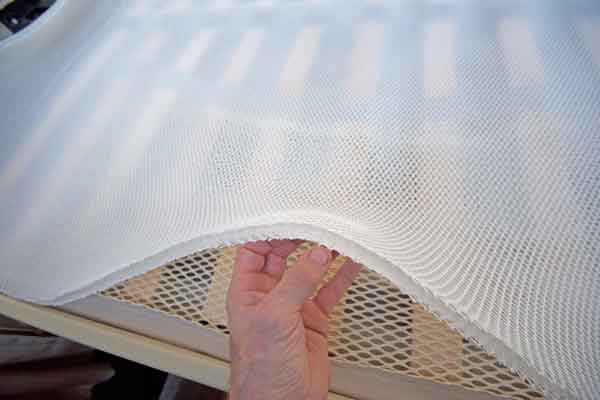
Step 5
With the Dry-Mat trimmed to the correct size, you’re all ready for the mattress to go back on top of it
Step 6
You can see how the Dry-Mat helps prevent the factory-fitted mattress sinking between the wooden slats


