Motorhome advice: How to add an extension to your waste water hose

Words and photos by Ron Francis
Having recently upgraded our motorhome from a 2006 T550 Hobby to a 2016 Benimar 231, I found that dealing with emptying the grey waste was tricky as the Benimar’s waste outlet is inboard, just behind the rear axle.
Our previous Hobby motorhome had an outlet that was just below the rear of the passenger door so could easily be lined up with service points on most campsites.
To utilise the waste facilities on a serviced pitch and for convenience when emptying at home, I decided to make up a length of 28.5mm internal diameter waste hose with an adaptor to fit into the outlet of our Benimar.
This is commonly found drain hose that most caravan or motorhome dealers sell.
To fit this hose to the Benimar needed a little bit of work, but wasn’t too bad.
I can now point the end of the hose into a motorhome service point drain, or fix another length of hose onto it so that it can reach a drain point on a fully serviced pitch. This design can of course be adapted to suit other brands of motorhome.
Tools you need to extend a motorhome waste water hose
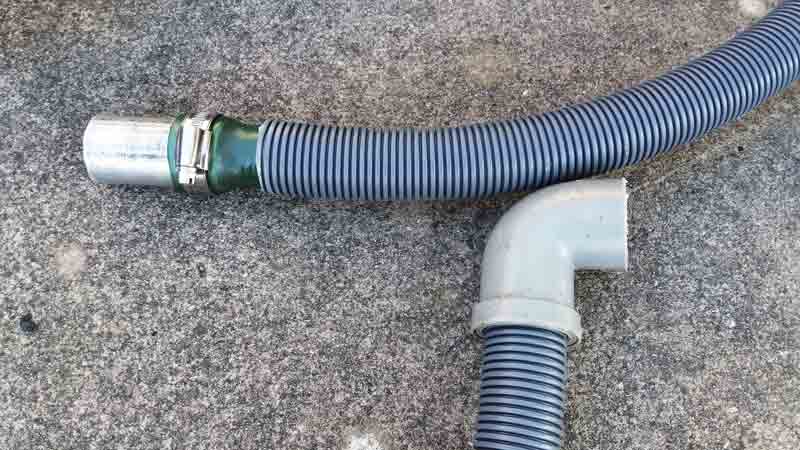
28.5mm ID flexible plastic hose (cost was £3.63 per metre from Amazon)
90-degree 40mm waste adaptor
Jubilee clip and metal tube for extension piece (optional)
Hacksaw and blade or jigsaw
Screwdriver
Cable ties
Contact adhesive
Step by step guide to extending a motorhome waste water hose
The first step was to adapt the waste tank’s outlet surround plate to give clearance for the 90-degree elbow. This is tricky to do in situ and you need to take care not to saw into the water tank itself.
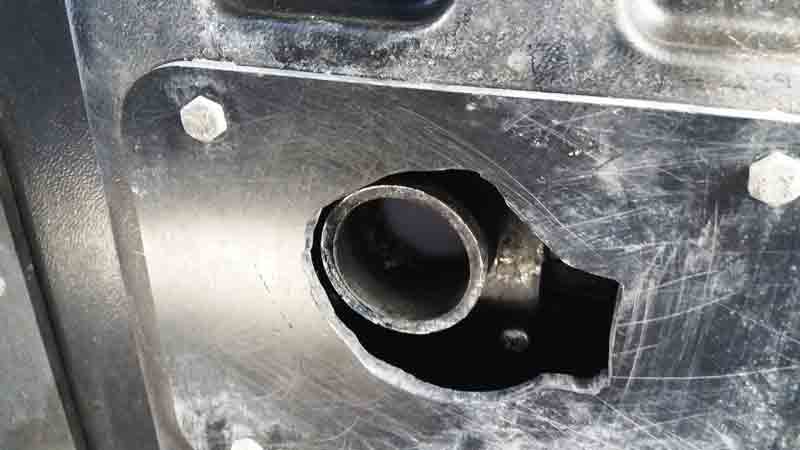
Then, cut the bead from the end of a 90-degree 40mm elbow to get it to fit the 40mm ID waste outlet. An extra section of hose and a metal tube was also made up to form an extension piece.
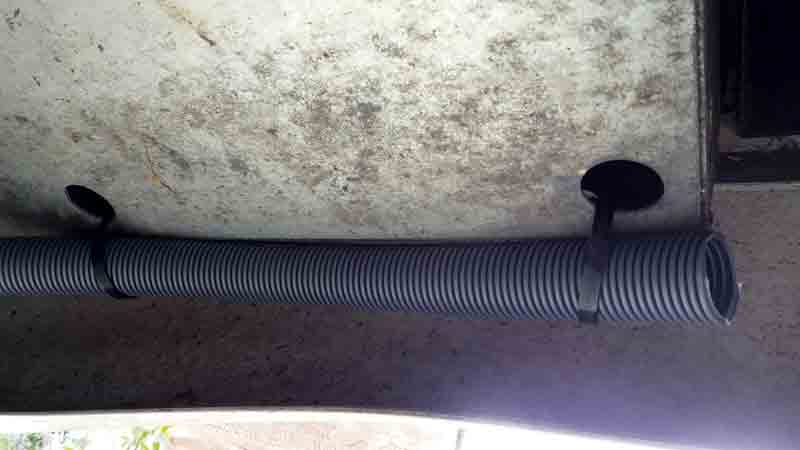
With the 90-degree outlet fitted using contact adhesive, the hose was secured to the outlet plate and run along the drainage rod with the help of a few cable ties. If you want to move the hose later, use removable cable ties.
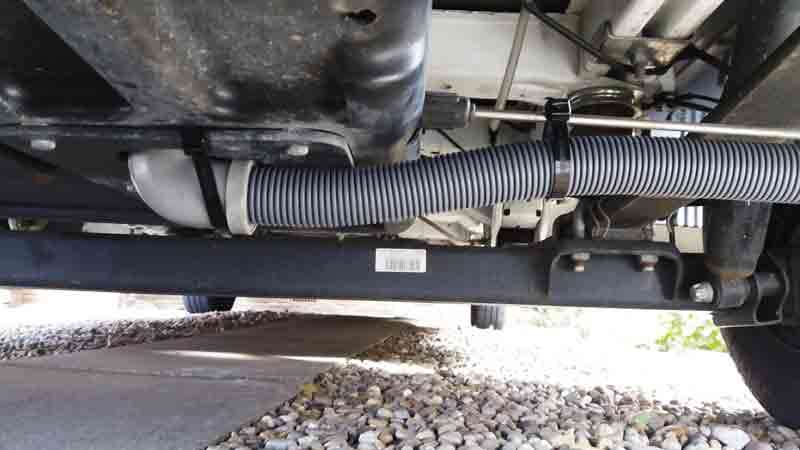
The hose was then curved around to face backwards and was fixed under the gas bottle compartment using cable ties through the vent holes. It can now either be used in situ or extended with the additional hose section
This advice article was originally published in the June 2019 edition of MMM - click here to buy a digital back issue of the magazine.


