


Motorhome advice: How to fit clearer speedo and tacho dials to a Ducato
When we got our Fiat Ducato Euro V-based Carado T135, I encountered a visual problem.
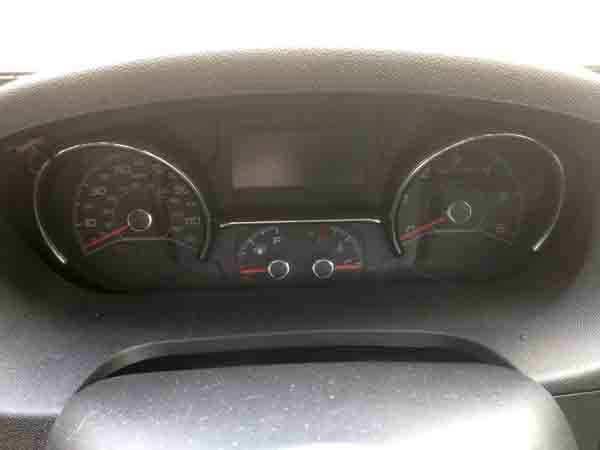
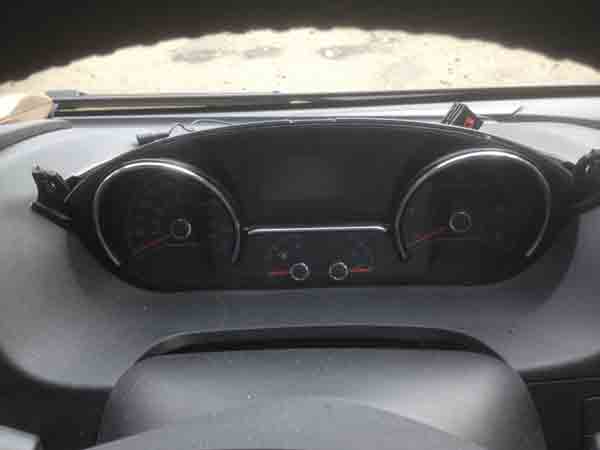
Driving with the sun low on the horizon, it was very difficult to see the speedometer. The standard speedo display uses white characters on a black background, which doesn’t lend itself to high visual interpretation, since most of what we read is black text on a white background.
I solved the immediate problem by driving with headlights on, which also put the instrument lights on. There was not much of a visual improvement, though.
I then resited the TomTom sat-nav adjacent to the rear view camera display so I could read my speed from that.
When we returned home, I contacted our local Fiat Professional dealer in York, North East Truck and Van, part of a commercial vehicle dealership and listed in the Fiat Handbook as an official Fiat commercial dealer for motorhomes.
This is the place where we took the ’van for its first service. I put my idea to Adam Donato at NE Truck and Van and he first suggested that he could rewire the instrument lights to come on when the ignition was switched on and bypass having to put the headlights on.
This he did but visibility was still not good, so we looked at getting two new dials made, one for speed and one for rpm.
Adam gave me the name of a company that manufactures instrument panel displays for imported vehicles that do not arrive in the UK with the correct legal dials.
It’s worth pointing out at this juncture that all vehicles used in the UK must by law have a speedo with dual markings, in mph and kph.
This has to be declared on the English language version of the certificate of conformity (CoC) when the vehicle is first registered with the DVLA. The CoC must also state that the vehicle has an appropriate fog light and that the headlights dip to the left, making the vehicle legal for driving on UK roads.
I contacted the instrument panel dial manufacturer, Lockwood International in Leeds.
The contact was very helpful and pointed out that there is a range of dials for our model of Fiat Ducato and that I would need to send the existing dials so it could make a copy with black numbers on a white background.
I thought that may be the end of my idea because I did not want to put my vehicle off the road while the dials were away being copied and I didn’t, at that stage, know exactly how to remove them.
I had no need to worry though because, when I told Adam at the Fiat dealership, he said it was no problem as he would send the substitute dials from his stock and they could be returned when the job was done.
I checked this was OK with the people at Lockwood International, confirmed with Adam the correct dials and he sent them direct to Lockwood International.
A week or so later I received a set of new dials with black numbers on a white background and Adam received his dials back, so the next job was to fit them.
Lockwood International manufactures and sells large numbers of dials to individuals and to motor companies and it provides a superb service of installation instructions that anyone with a reasonably practical mind can follow.
The first task is to remove the existing dials.
Instructions and images for accomplishing this task are available from Lockwoods’ website before you purchase the dials and I am gratified to see that Lockwoods has made the white dials that I first ordered, available as a stock item on its website for £55.
Tools you need for the job:
Lockwood white dial kit for manual Ducato 2015 onwards - £55
Torz screwdrivers or bit set
Selection of screwdrivers
Side cutters
Useful contacts:
Speedo dials available for Fiat Ducato, Citroen Berlingo and Relay, Peugeot Boxer, Ford Transit and Tourneo, VW Transporter plus many others.
Lockwoodinternational.co.uk
01132 440070
Step by step guide to fitting clearer speedo dials
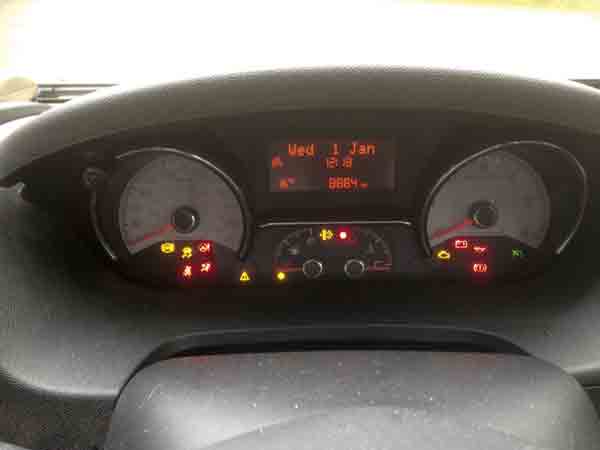
1. This is the original set-up and it's not easy to read the dials in low light conditions.
Make sure all the dials are in their 'rest' position:
2. Remove the two Torx screws under the lip of the dash cowl.
Then unclip the cowl by lifting the edge that is closest to the windscreen:
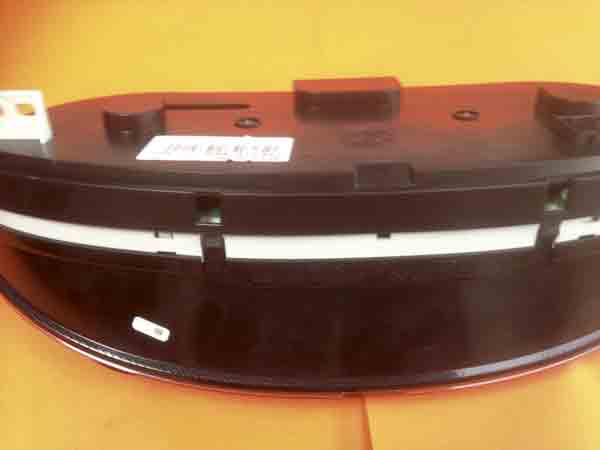
3. With the cowl removed, unclip the wiring loom and remove the two Torx screws holding the instrument pod to the dash:
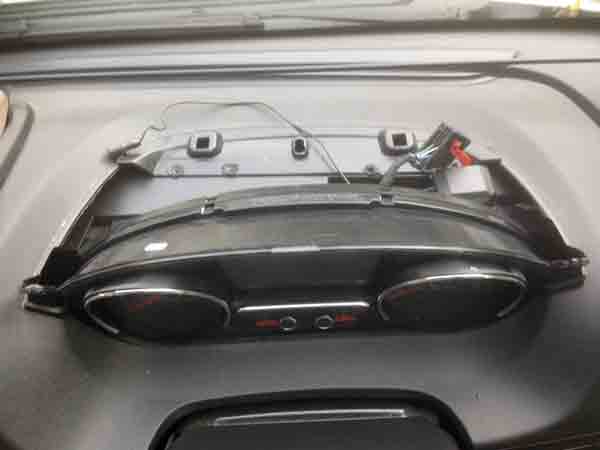
4. Move your instrument pod to your work bench:
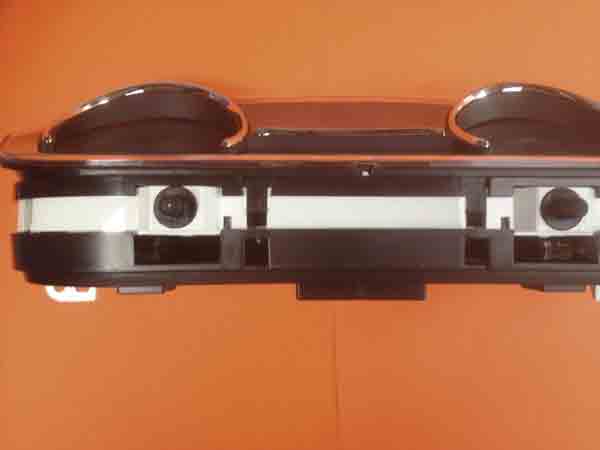
5. Release the fascia of your instrument pod by carefully pressing in the plastic lugs on the top edge...
6. ... and also on the lower edge and sides. There are six in total.
Take care to separate the two halves evenly:
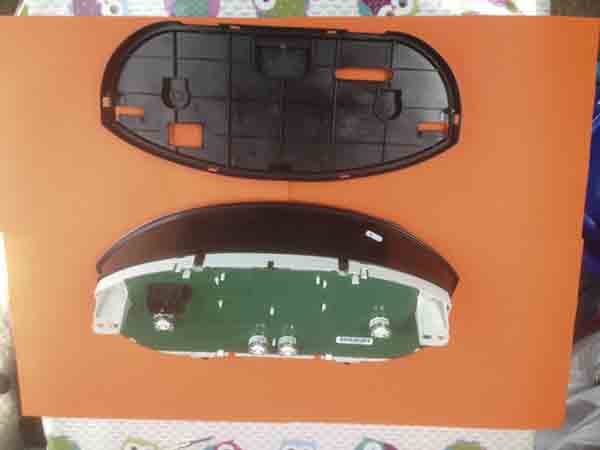
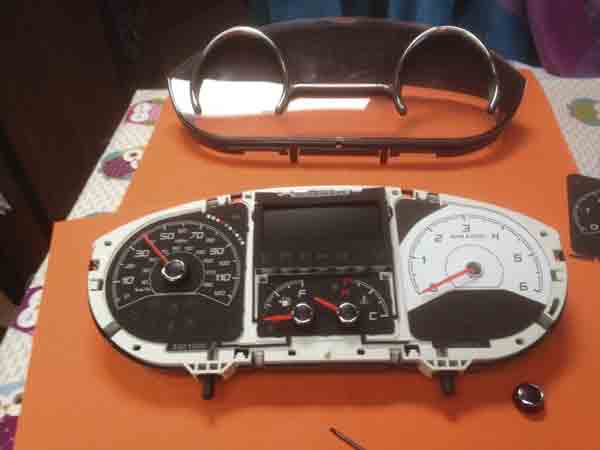
7. With the back removed, it should look like this:
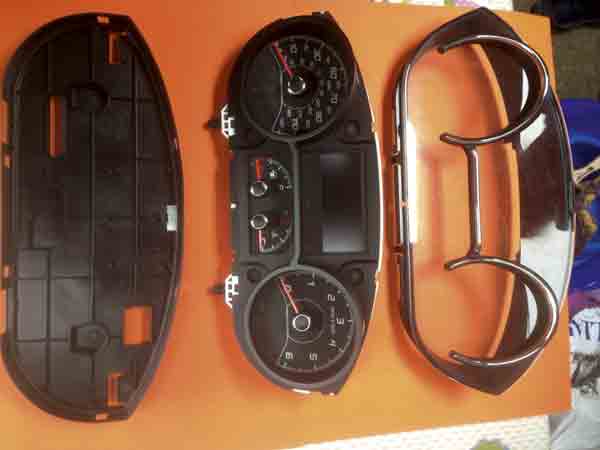
8. Remove the clear front cover of the instrument unit and remove the plastic bezels
covering the speedo and tacho faces:
9. Pry up the centre plastic 'hub cap' of the tacho needle with a small screwdriver.
Snip the plastic strip that connects the tacho face to the temperature gauge face:
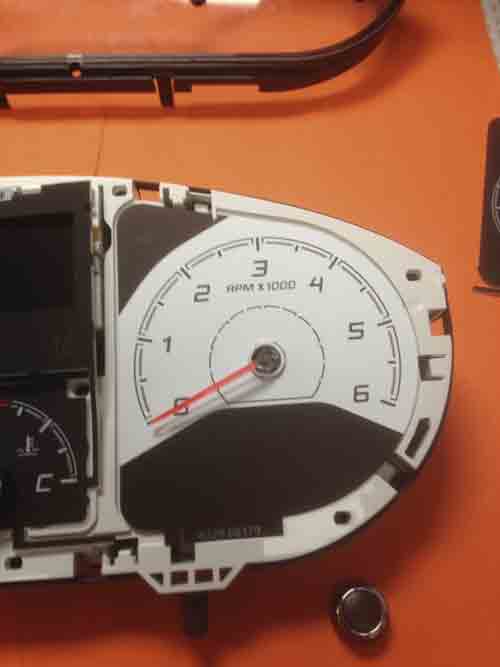
10. Remove the original tacho face. You can now slip the new white tacho dial over the needle and position it carefully in place. Make sure the needle points to its usual rest position:
11. The speedo dial is changed in exactly the same way.
Clip the needle 'hub caps' back in place and adjust the needles (if necessary) so that they read zero:
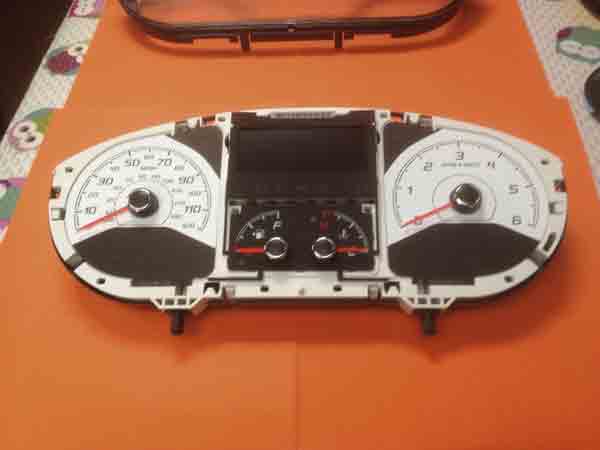
12. Replace the plastic bezel surrounds to the dials. Next, refit the clear covers and clip the backing section back in place:
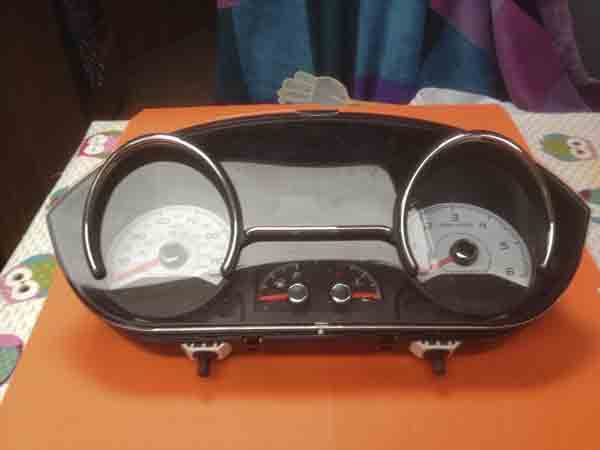
13. Plug the instrument cluster into the vehicle and check all the warning lights and dial work correctly.
Refit the Torx screws and cover if it all works:
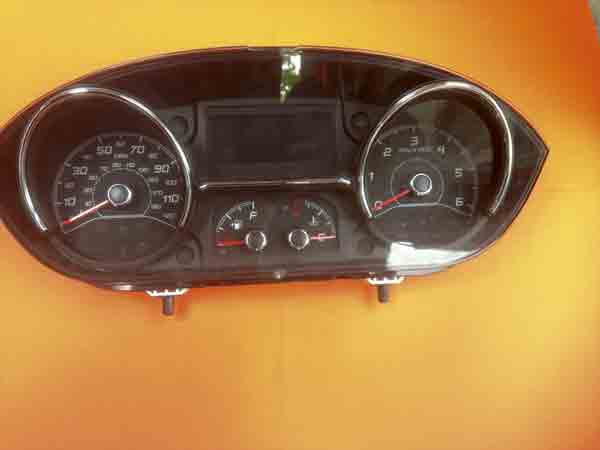
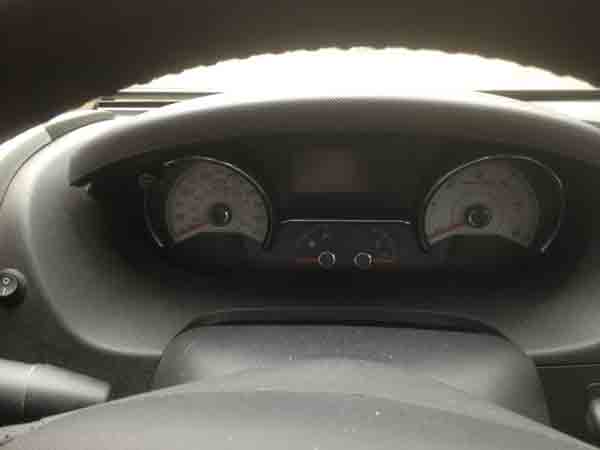
14. Even with the headlights off and in low light conditions, the white dials are easier to read than the stock Fiat ones:
If you found this article useful, get a digital subscription to MMM magazine - you'll find practical issues and technical queries answered every month. Read other practical advice articles here.

Recent Updates
Engine management lights: all you need to know
What is the engine management light? What does it mean, and what do I have to do? ...
Motorhome air suspension: all you need to know
Motorhomes are heavy and the additional weight of equipment and height of the bodywork can increase the loads ...
Motorhome WiFi: how to get better motorhome internet
Staying connected on the move is more and more essential, so relying on campsite WiFi isn't an option – here ...
A class of their own - our guide to A-class motorhomes
Thinking of trading up to an A-class, or even going straight to the top of the motorhome tree? We guide you ...
Explore overseas on a motorhome dream tour
Enjoy exotic travel in a campervan or motorhome by hiring, swapping with someone else or exporting your ...
Motorhome water systems: everything you need to know
On-board water is an important part of every motorhome – here’s everything you need to know ...
Campervanning in Europe: what you need to know
Whether you're planning a leisurely drive through the French countryside, navigating bustling city streets in ...
Campervan security: all you need to know
With thefts on the increase, it’s important to know how to keep your campervan secure and prevent campervan ...
Campervan furniture: everything you need to know
Our campervan experts guide you through all the essentials for your campervan, including tables, chairs, ...
Campervan finance: how to fund your purchase
Here we look at the different types of campervan finance available, to help you decide what’s the best option ...
Other Articles
Britain’s best used motorhomes
Want a great motorhome without paying the premium for a new one? Here's a guide to the best you can get in the pre-owned market for each layout, ...
Which motorhome? Choosing the perfect motorhome for you
Choosing a motorhome or campervan is one of the biggest buying decisions you’ll ever make, so it's important ...
Campervan washroom essentials: stay fresh on the road
Our guide will take you through the campervan washroom essentials you'll need so you're well-prepared for ...
Dogs in campervans: all you need to know
Follow our advice and your dog will enjoy campervanning as much as you do ...
Electric campervans: all you need to know
Our guide will take you through everything you need to know about electric campervans and what the future ...
Motorhome electrics: a complete guide to your motorhome electrical set-up
Motorhome electrics can dramatically enhance the convenience and comfort of your vehicle – but they can be ...
Lighting for campervans: all you need to know
We guide you through all the lighting options available for you and your campervan, including interior ...
Electric bikes for motorhomes: our ultimate guide
Read our comprehensive guide to electric bikes for motorhome owners, helping you add electric power to your ...
Our guide to 'cheap' motorhomes in 2024
If you're on the hunt for an affordable new motorhome, this is the best place to start – we've rounded up a ...
Campervans in winter: all you need to know
Here's your guide to preparing your campervan for the colder months, whether you will be using it or putting ...